How To Enable PHP Error Logging
The PHP Error log is a useful way of finding and troubleshooting errors that exist on your site. Once it is enabled, any PHP errors generated by your site will be recorded in a log file.
Enable in cPanel
Step 1 - Log into cPanel and click on Select PHP Version.
Step 2 - Click on Switch to PHP Options.
Step 3 -
(1) Select Log_Errors.
(2) Confirm the location of the error log. In this case, it's'/home/<cPanel_Username>/public_html/error_log'.
(3) (Optional) If you would like PHP errors to display on the live site for ease of troubleshooting, select this option.
Enable through .htaccess
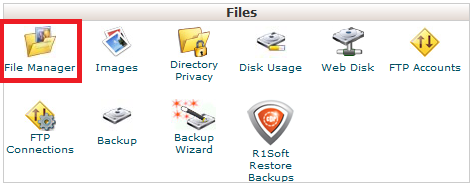
Step 1 - Log into cPanel and click on File Manager.
Step 2 - Edit your .htaccess file and add the below code to the top.
php_flag log_errors On
php_value error_log /home/CPANELUSERNAME/public_html/error_log
Be sure to replace CPANELUSERNAME with your cPanel account's username. It should look something this:
Hit Save Changes in the top right once that's finished then click Close to close that file.
View the error log
Note: If an 'error_log' file does not exist, it will be created when a PHP error is generated. If your error log is over 10MB, it will load too slowly to be useful in troubleshooting. In this case we would recommend renaming the current log to 'error_log.CURRENTDATE' so any new errors are created in a new 'error_log' file.
Step 1 - Open the File Manager.
Step 2 - Navigate to the public_html directory. You should see a file called 'error_log'.
Note: On a VPS or Dedicated server, you might need to visit "/home/<cPanel_Username>/public_html/logs/yourdomain-com-au-error_log" instead.
Step 3 - Right Click the Error Log and select either View or Edit. Alternatively, double-click the file to Download it, then open it in your text editor of choice.
Finally, depending on the permissions granted to the error log, you may be able to access it publicly by visiting the site "yourdomain.net.au/error_log".