Email Setup for Android Phones (Samsung and other)
Before you start:
A) Make sure you have the correct email settings for your account.
Click here for a guide on finding your correct email settings. Other than the username (Email Address) and password, all settings will be exactly the same for all email accounts on the same domain.
B) If you're unsure what your email password is,
click here for a guide on how to change it.
C) If your device has been logging in with the wrong password for some time, you may find that your IP address is automatically blocked on our server firewall. You can follow
this guide to resolve an IP block.
Newer operating systems
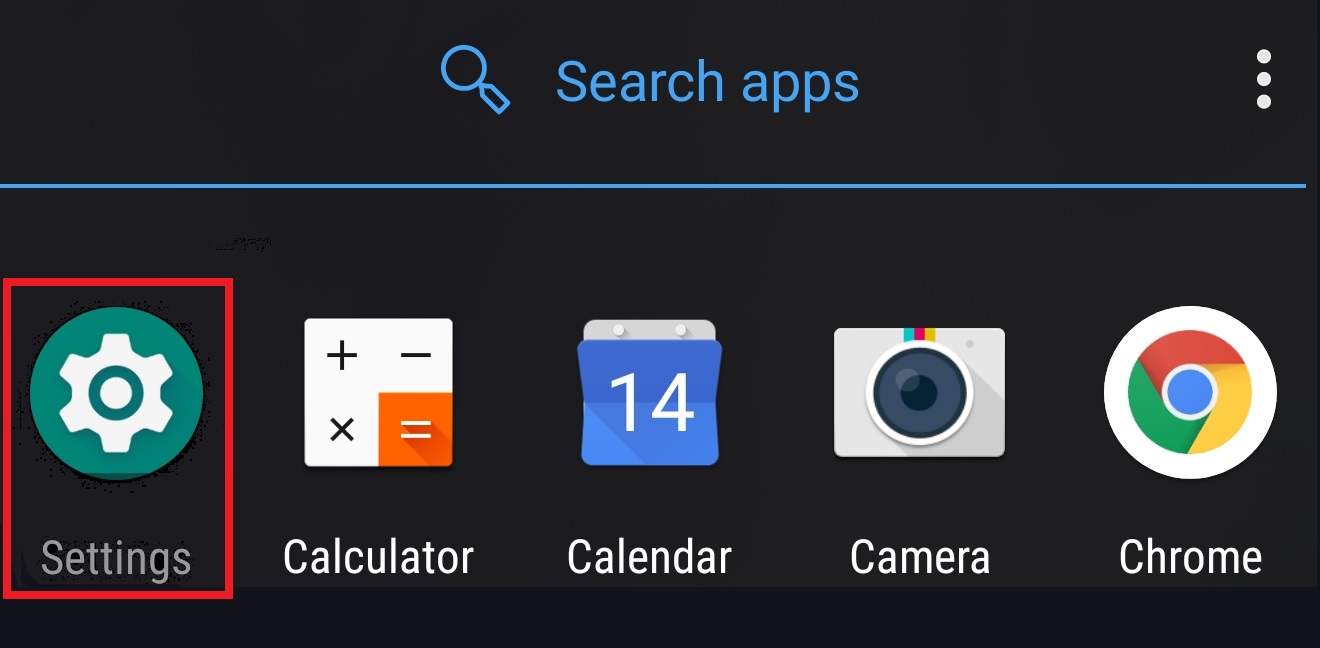
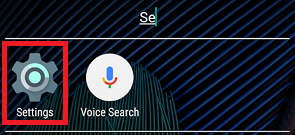
Step 1 - Find the Settings app and open it.
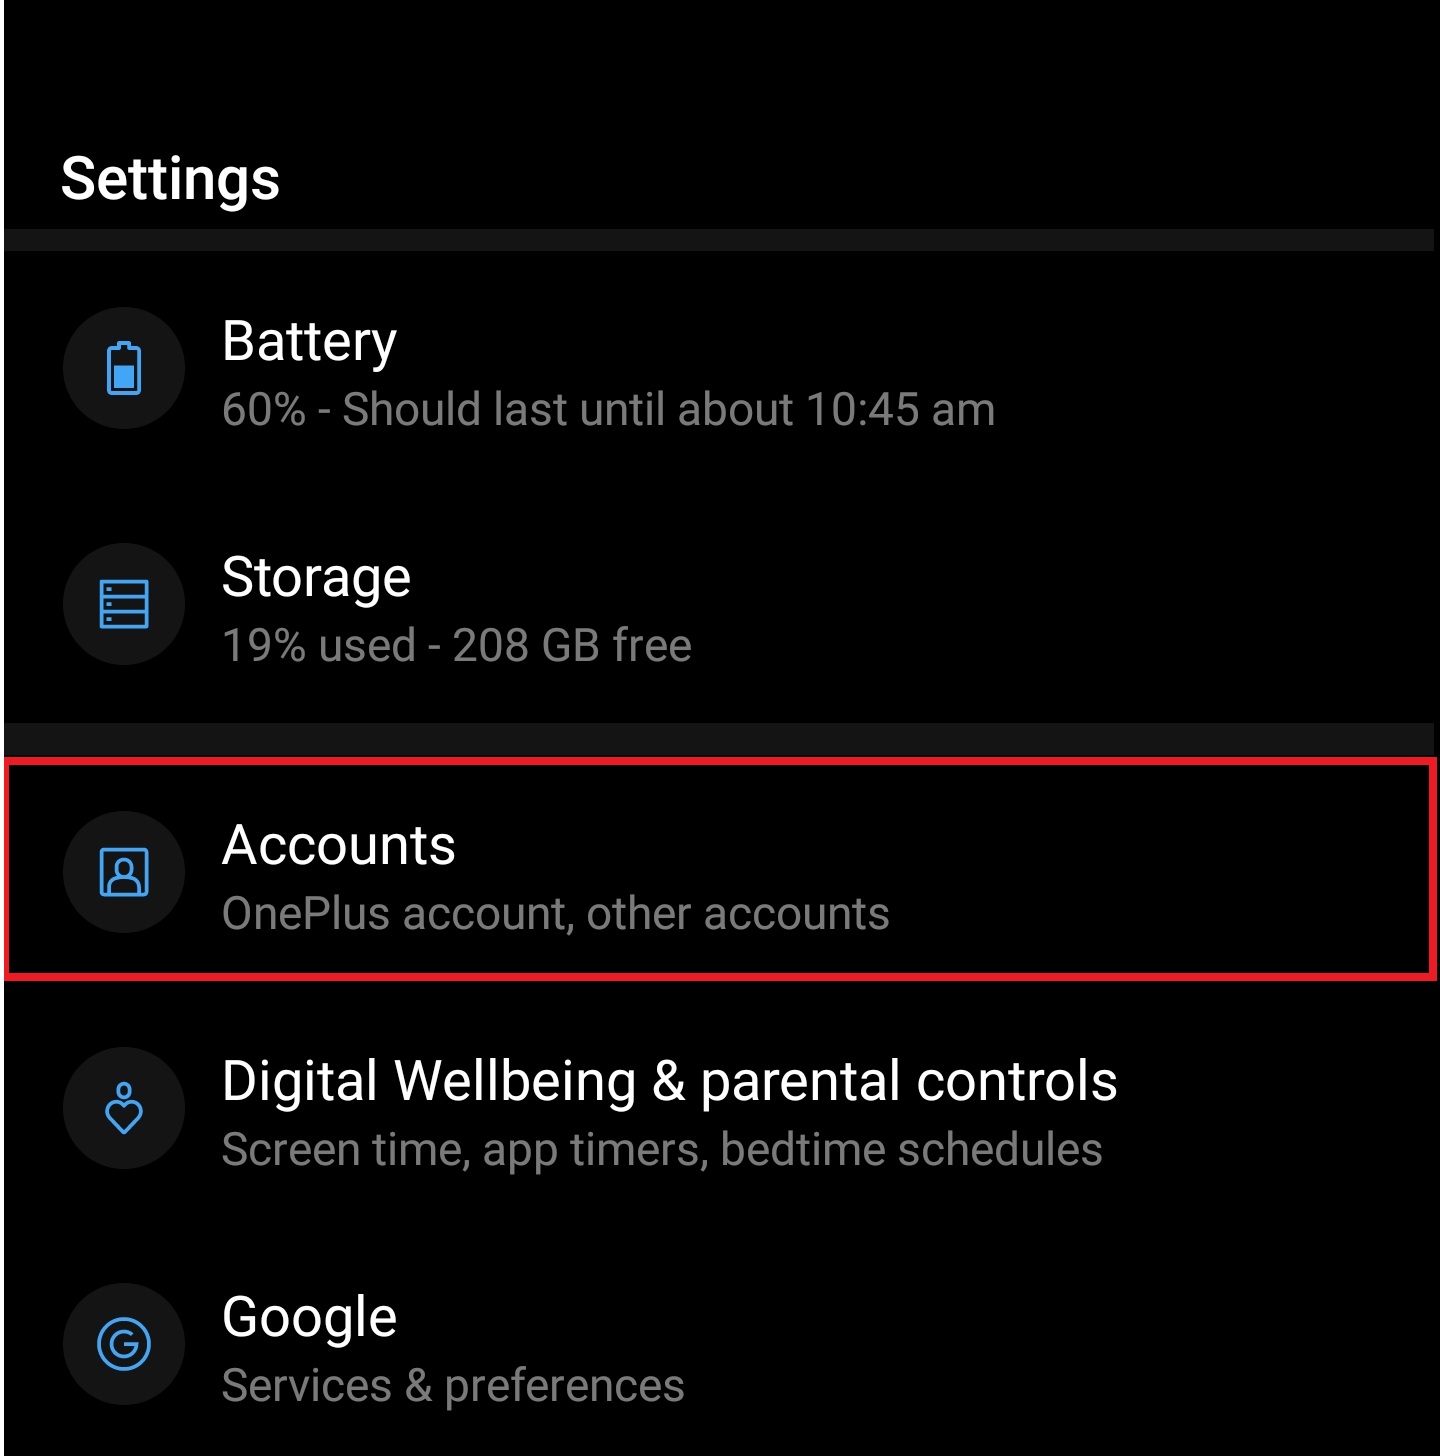
Step 2 - Select Accounts.
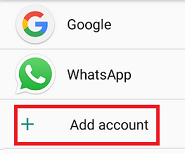
Step 3 - Select Add Account.

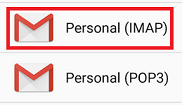
Step 4 - Select Personal (IMAP).

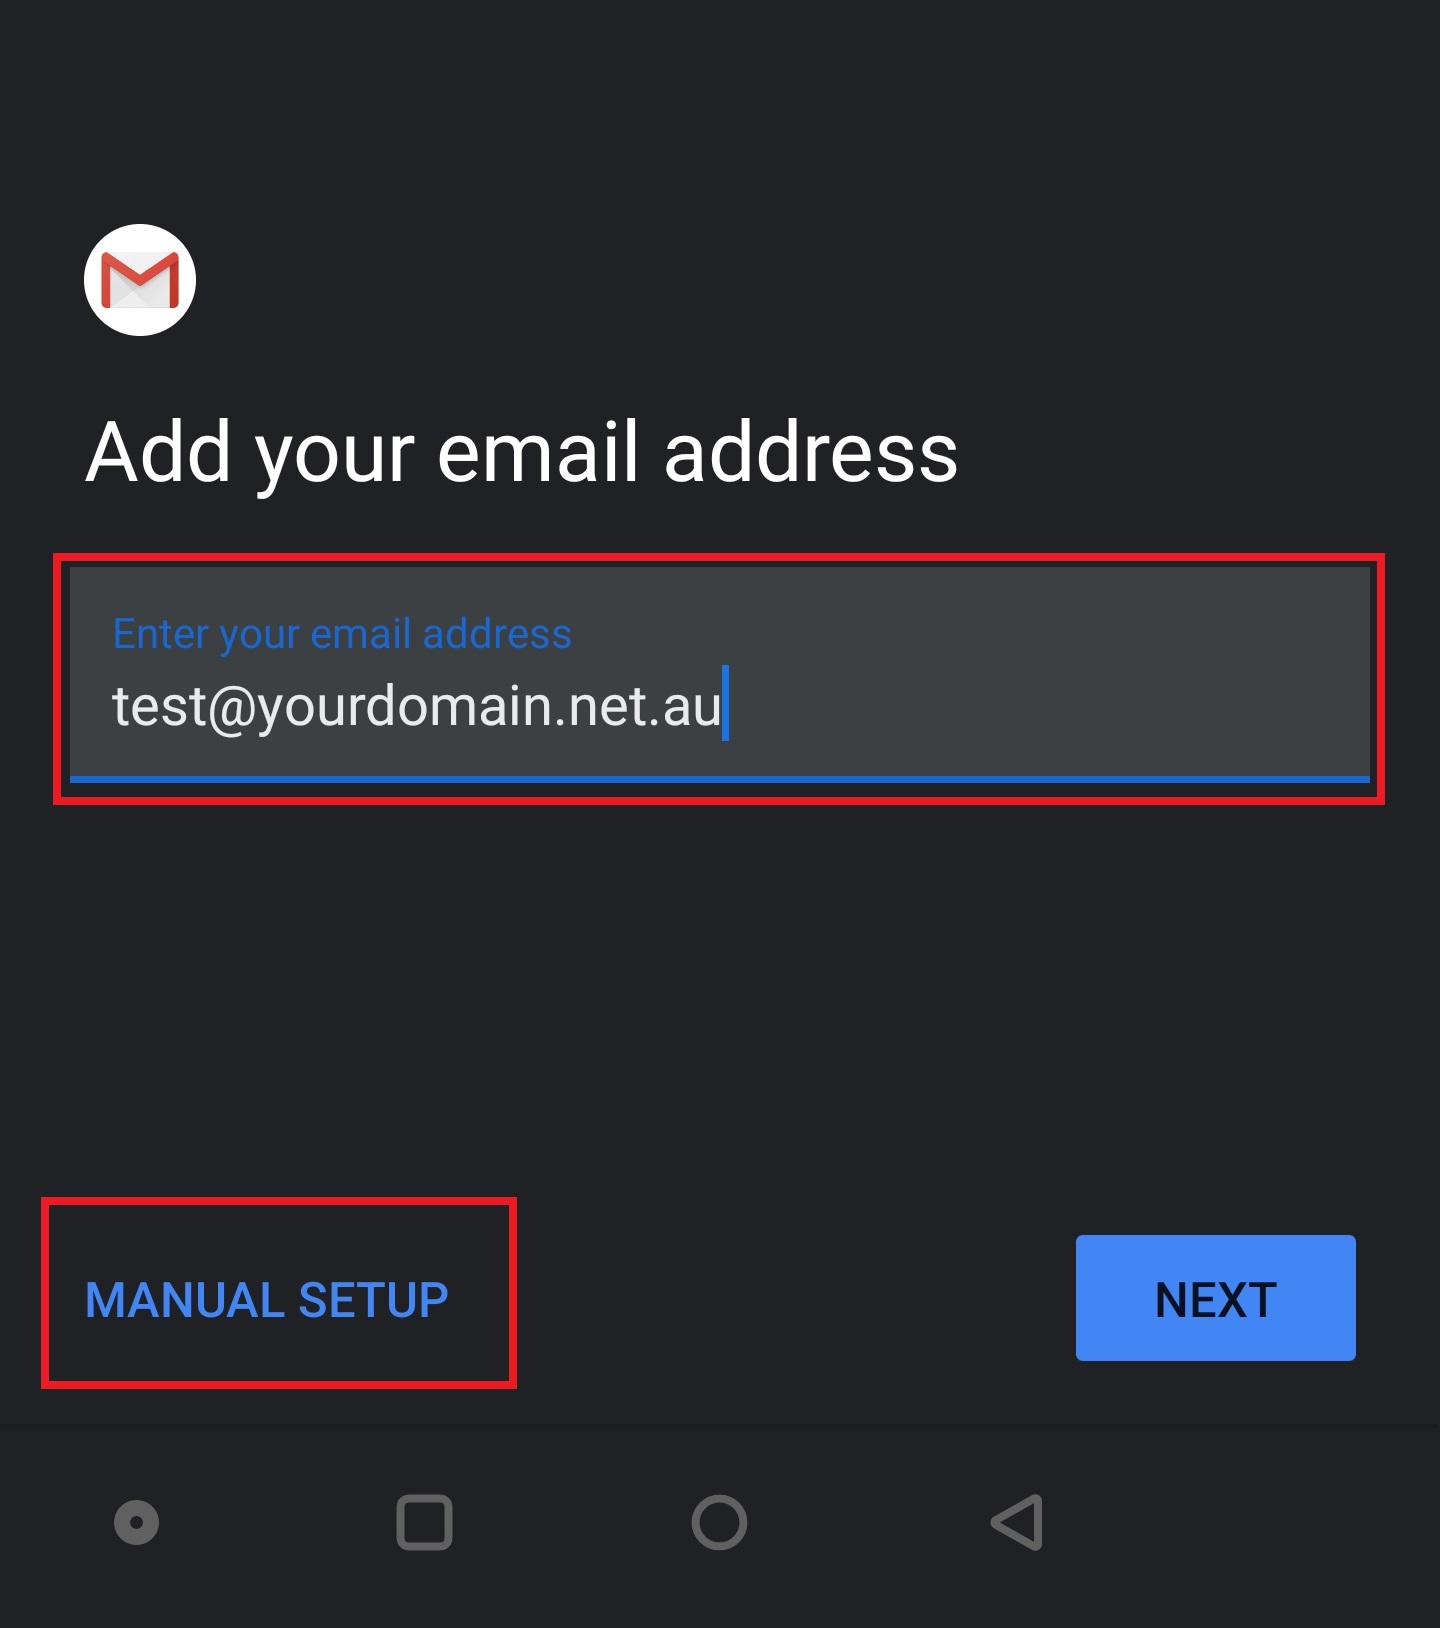
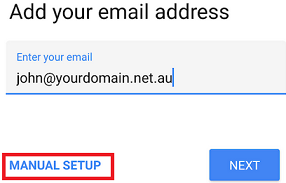
Step 5 - Add your email address, then select MANUAL SETUP.
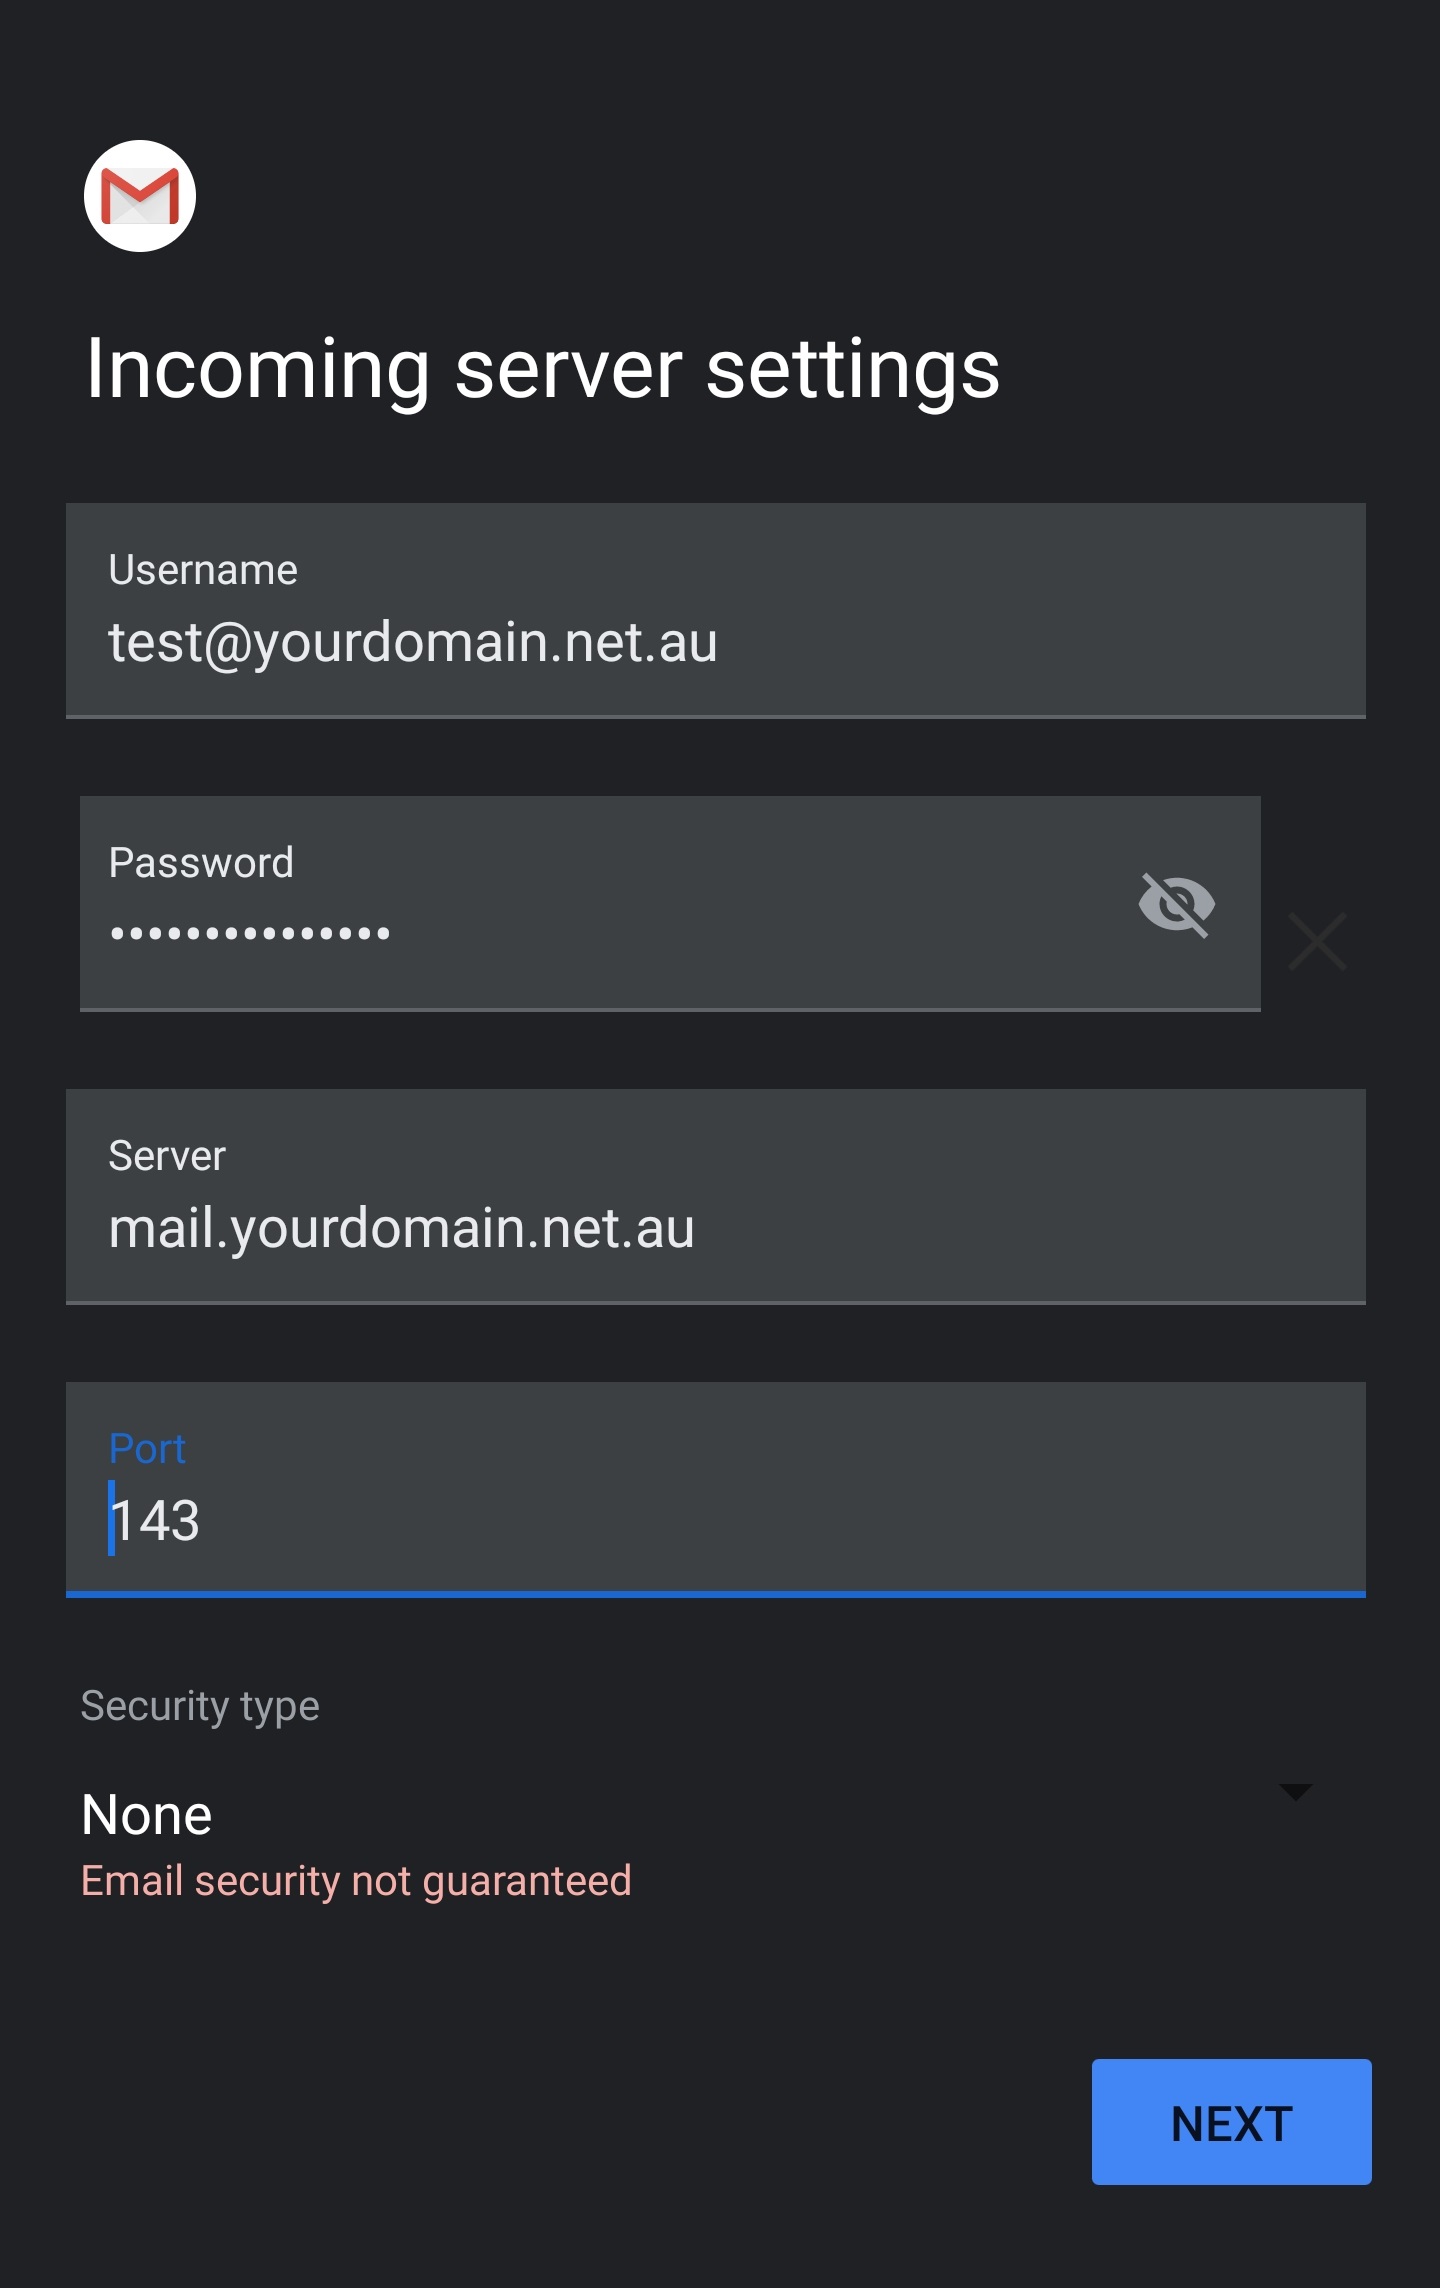
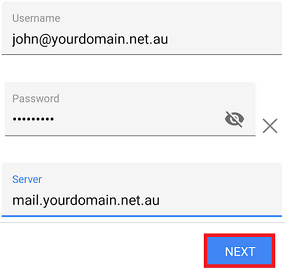
Step 6 - Enter your Username, Password, and the incoming mail server settings found here, then select Next.
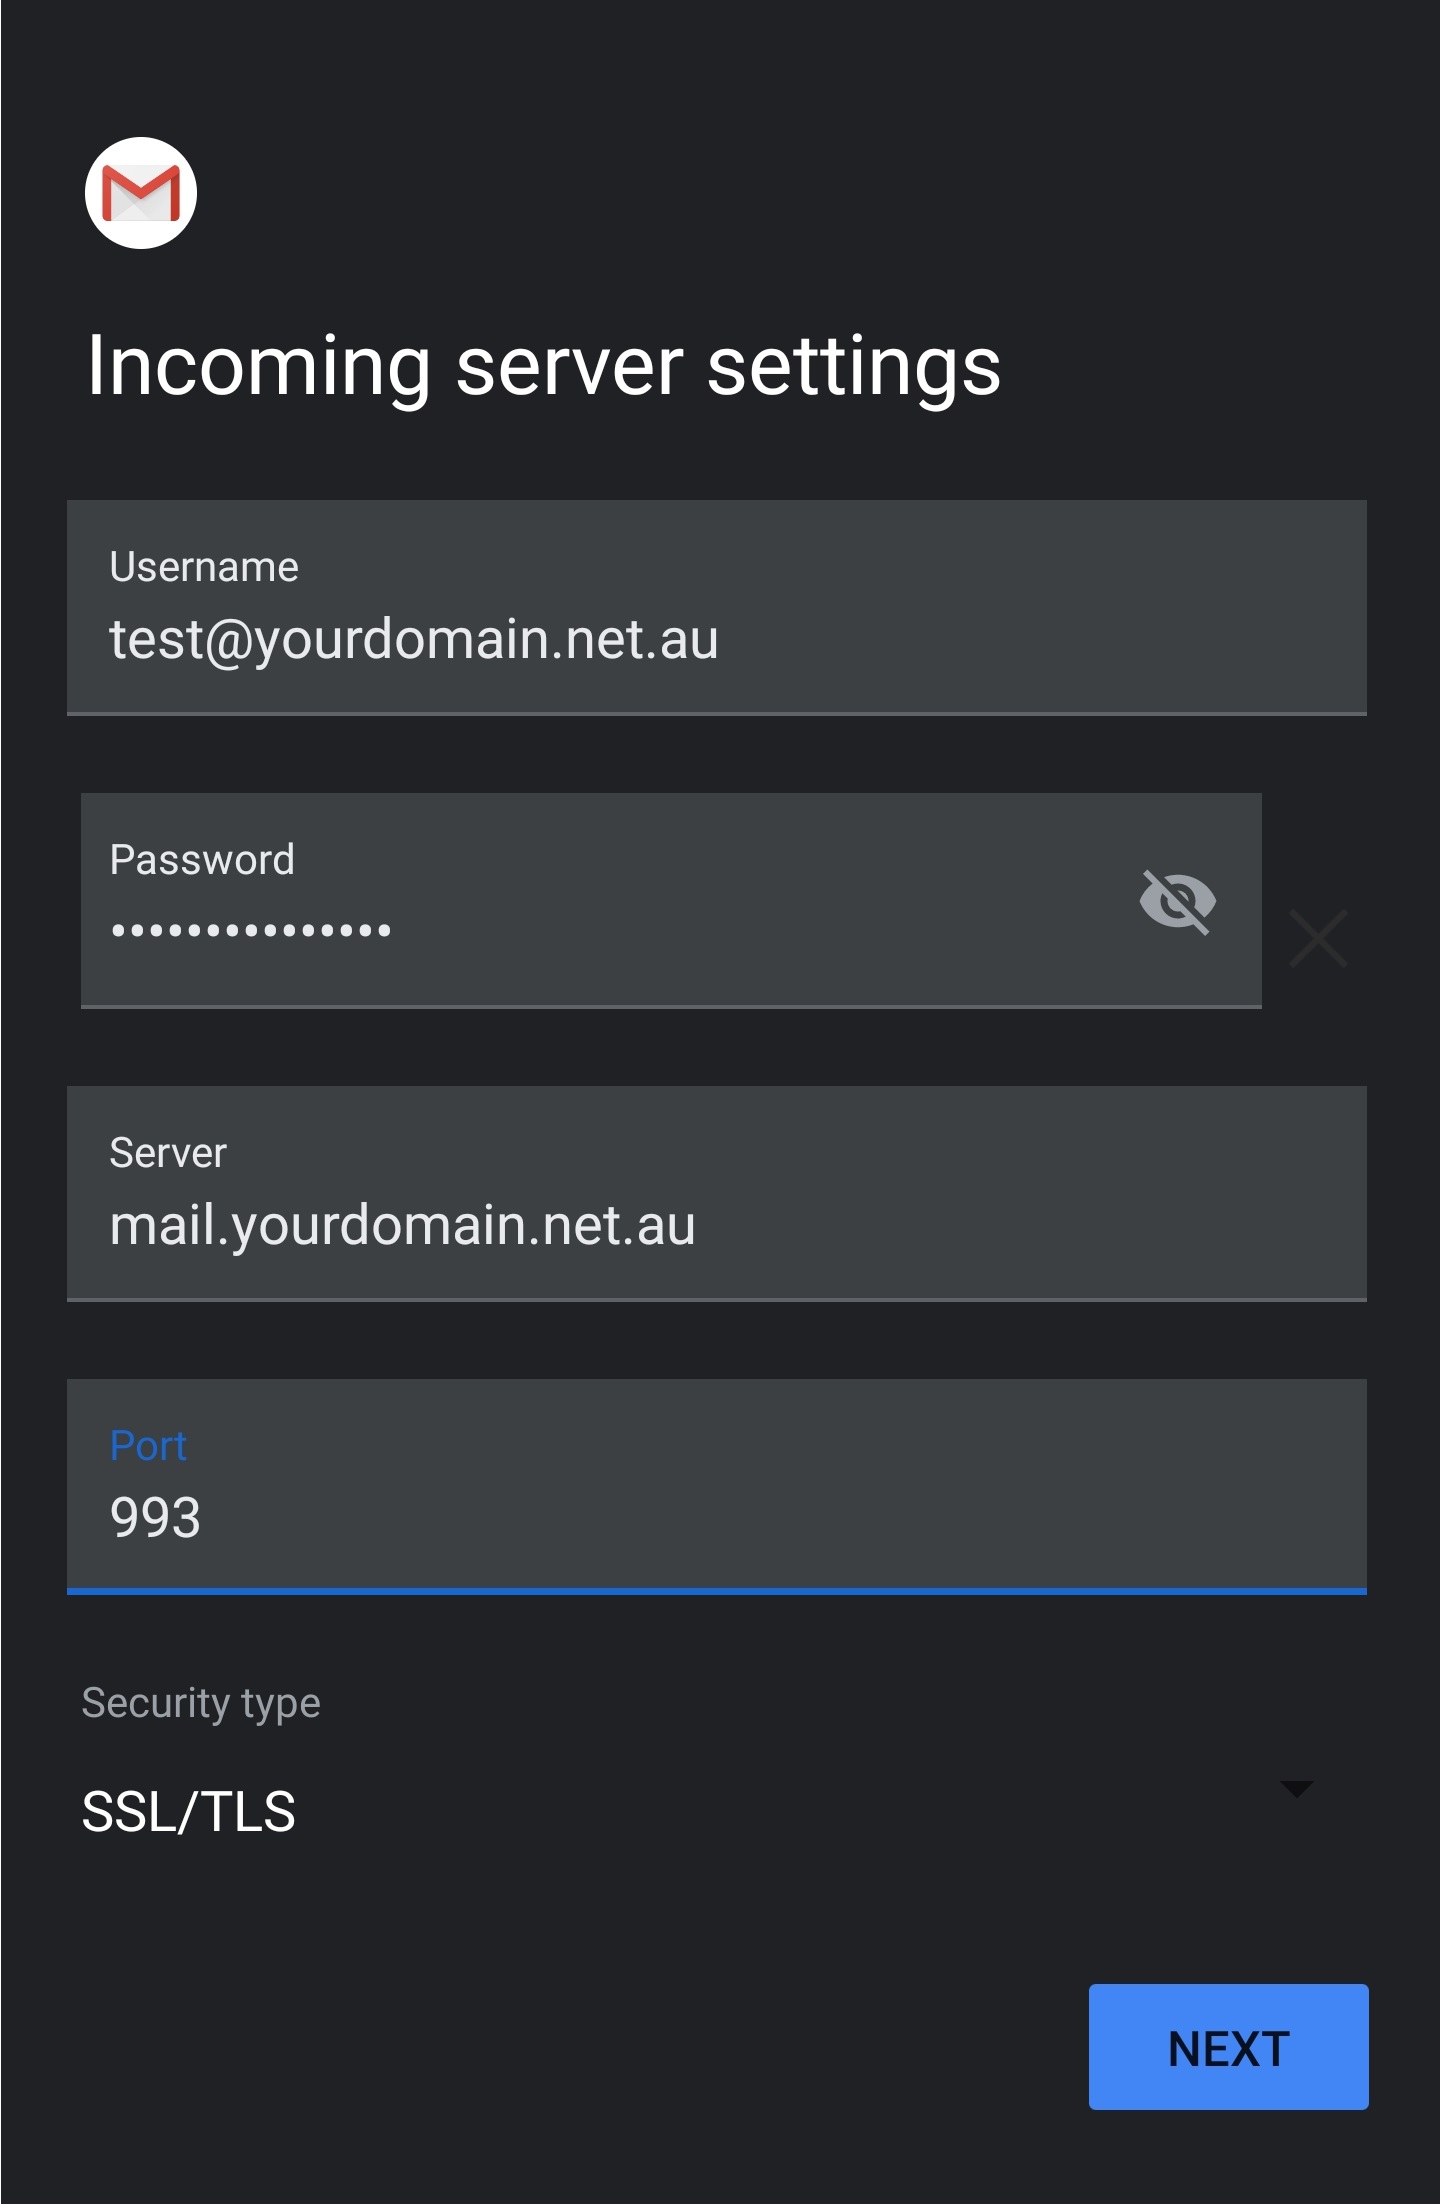
Note: On rare occasions, due to some network settings on your router/firewall or on an outdated mail client, the SSL settings above don't work. If you continue having problems, try these Non-SSL settings instead.
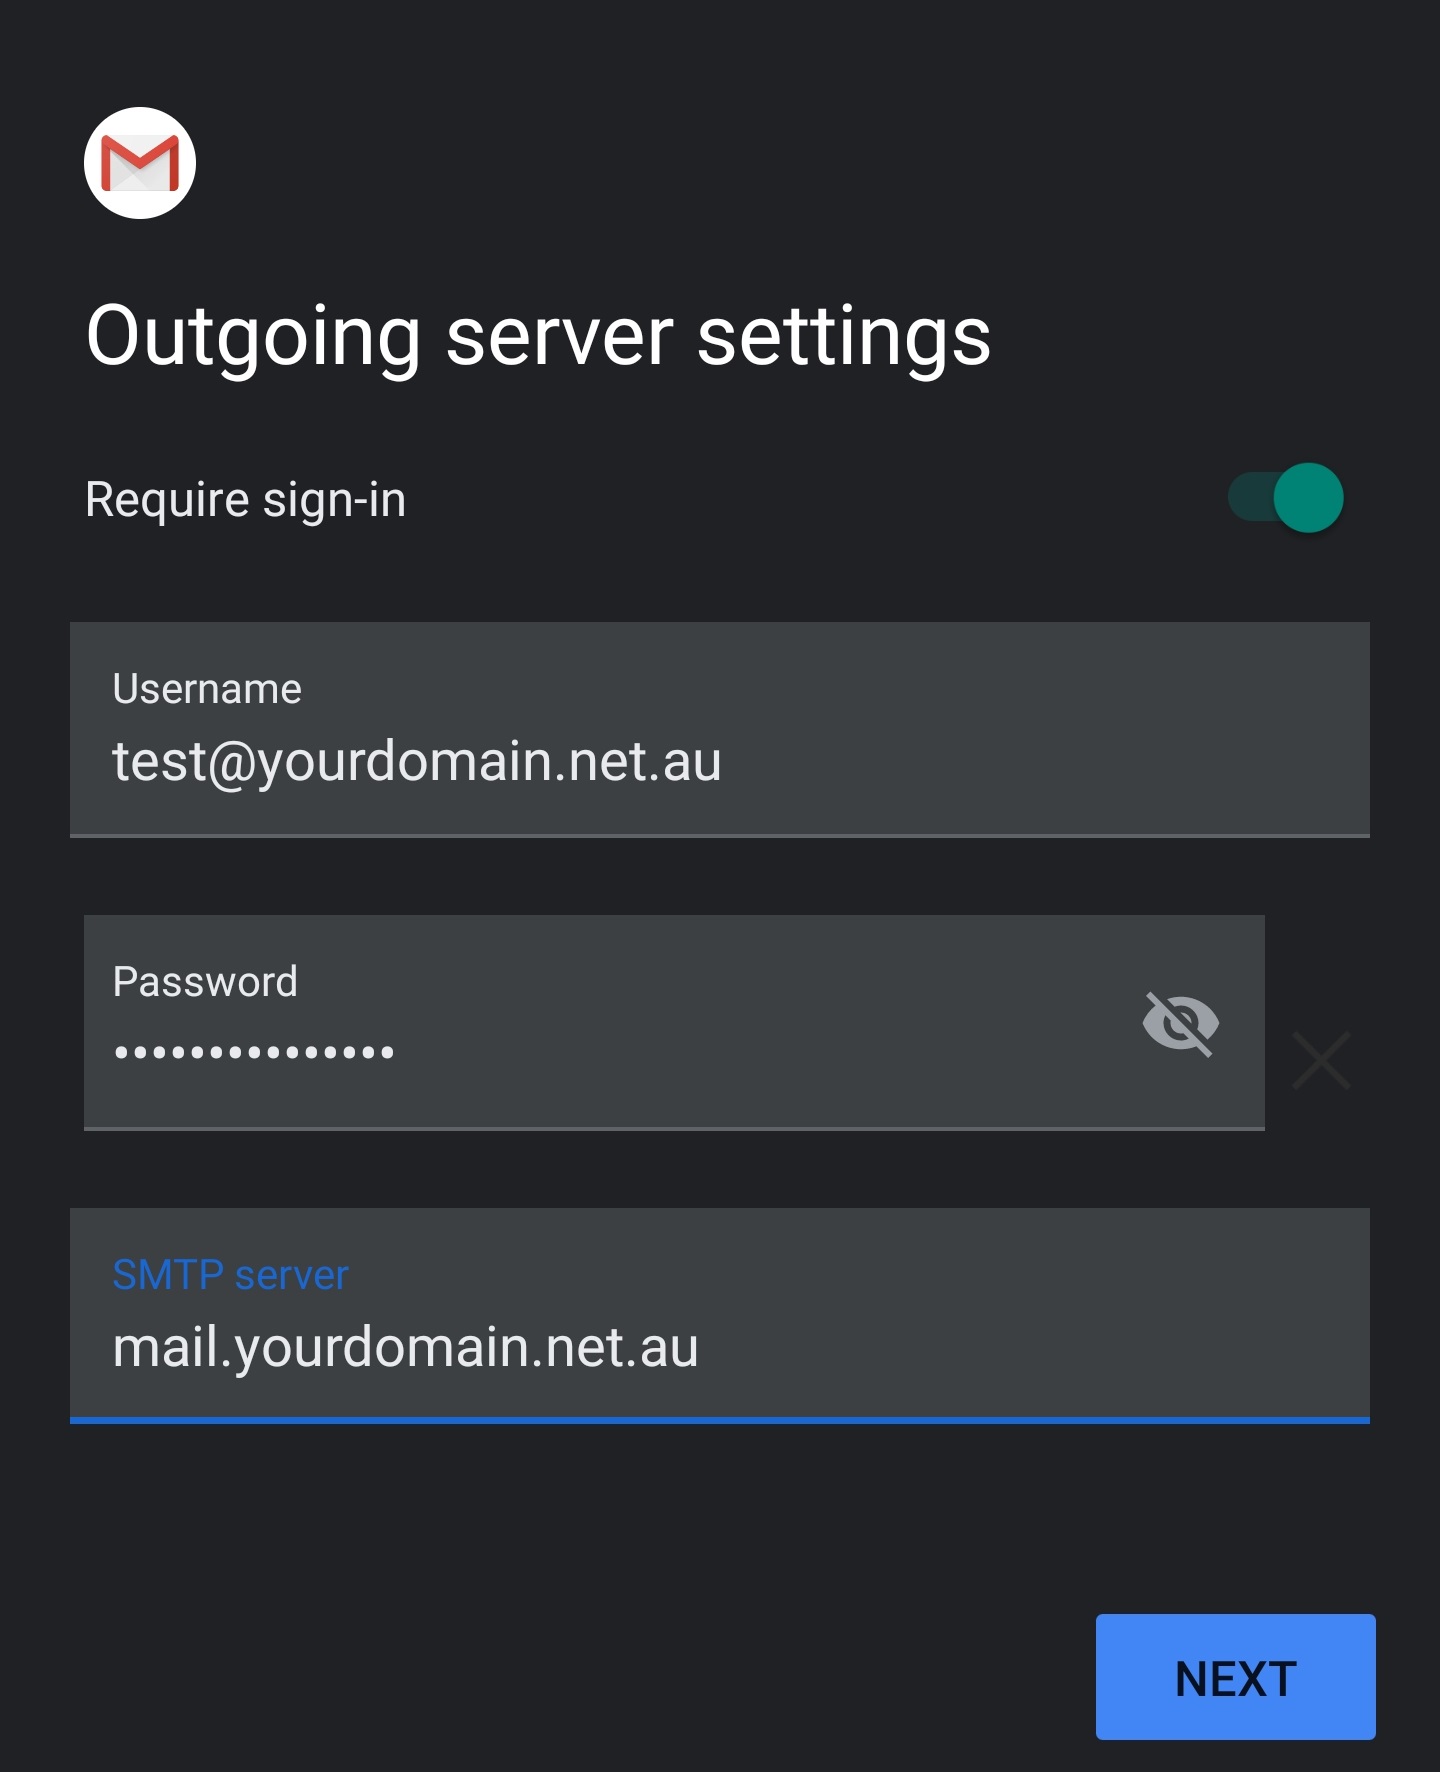
Step 7 - Enter your Outgoing server settings. Usually the SMTP server port is autoconfigured, but if not use port 465 for SSL (default) or port 587 for non-SSL.
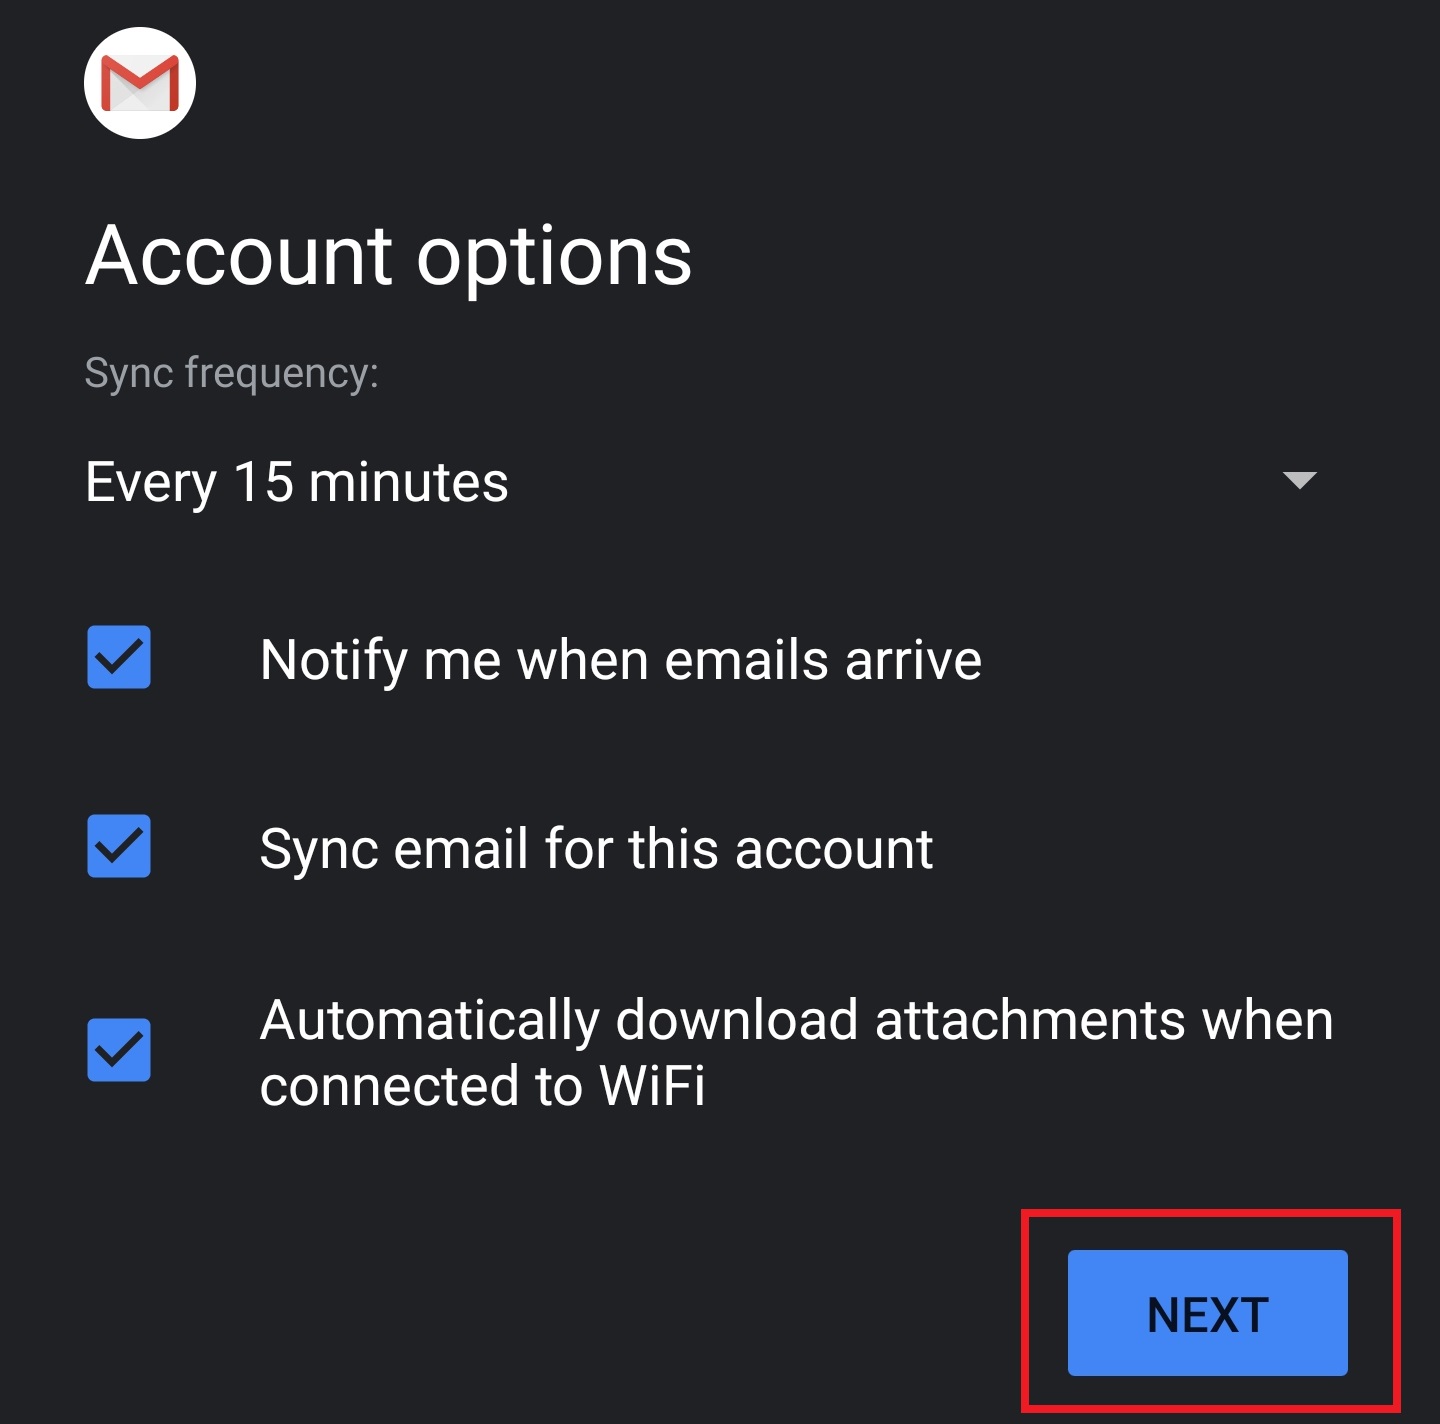
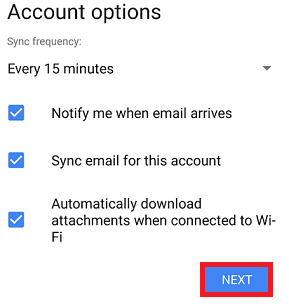
Step 8 - Leave these settings as default and select Next.
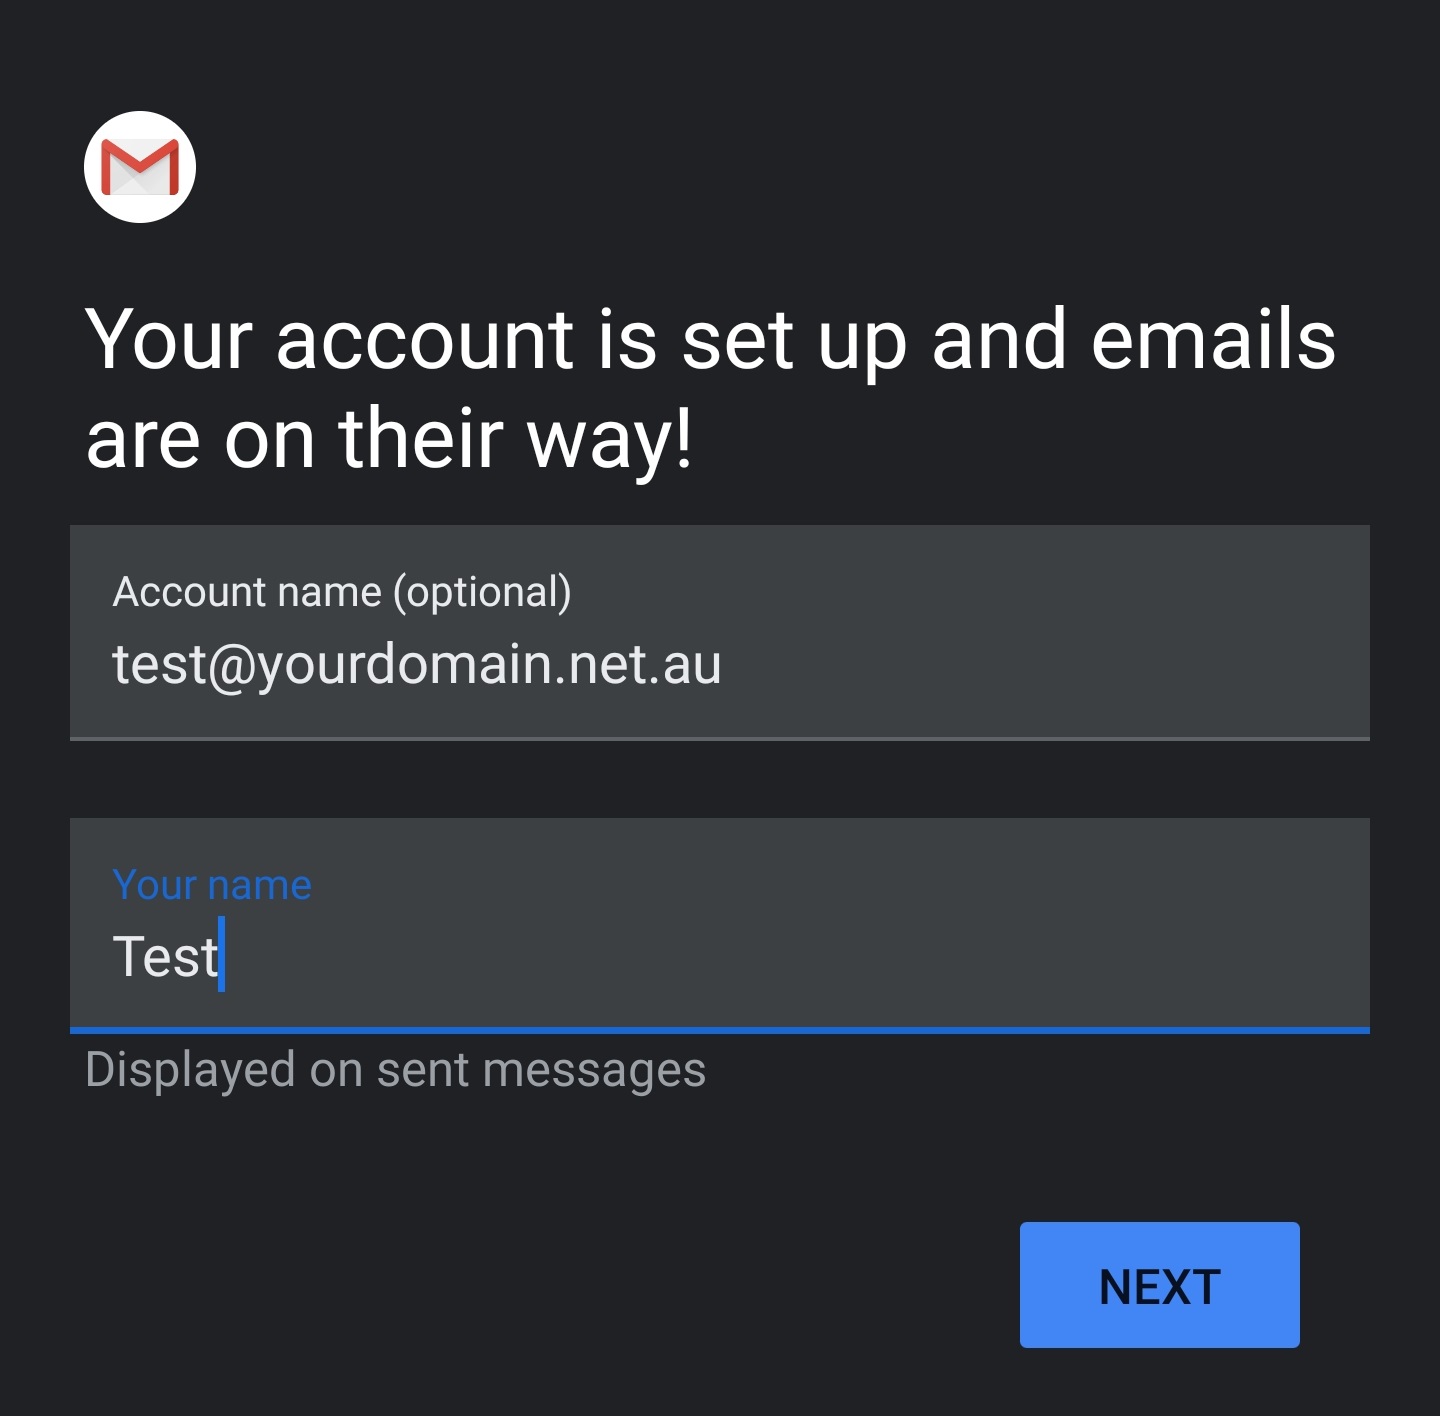
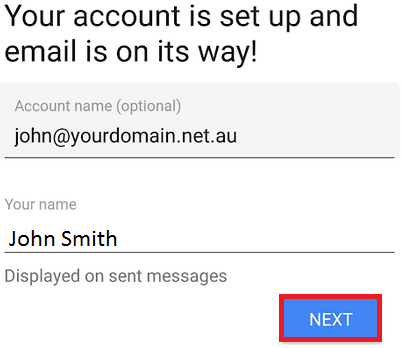
Step 9 - Enter in a name for your email account, and select Next.
Step 10 - Close the App completely, then open the default Gmail app and try sending an email from / to your email address (e.g. from john@yourdomain.net.au to john@yourdomain.net.au). If you can receive emails on the phone, your incoming settings are correct. If you can send mail from the phone, the outgoing mail settings are correct as well.
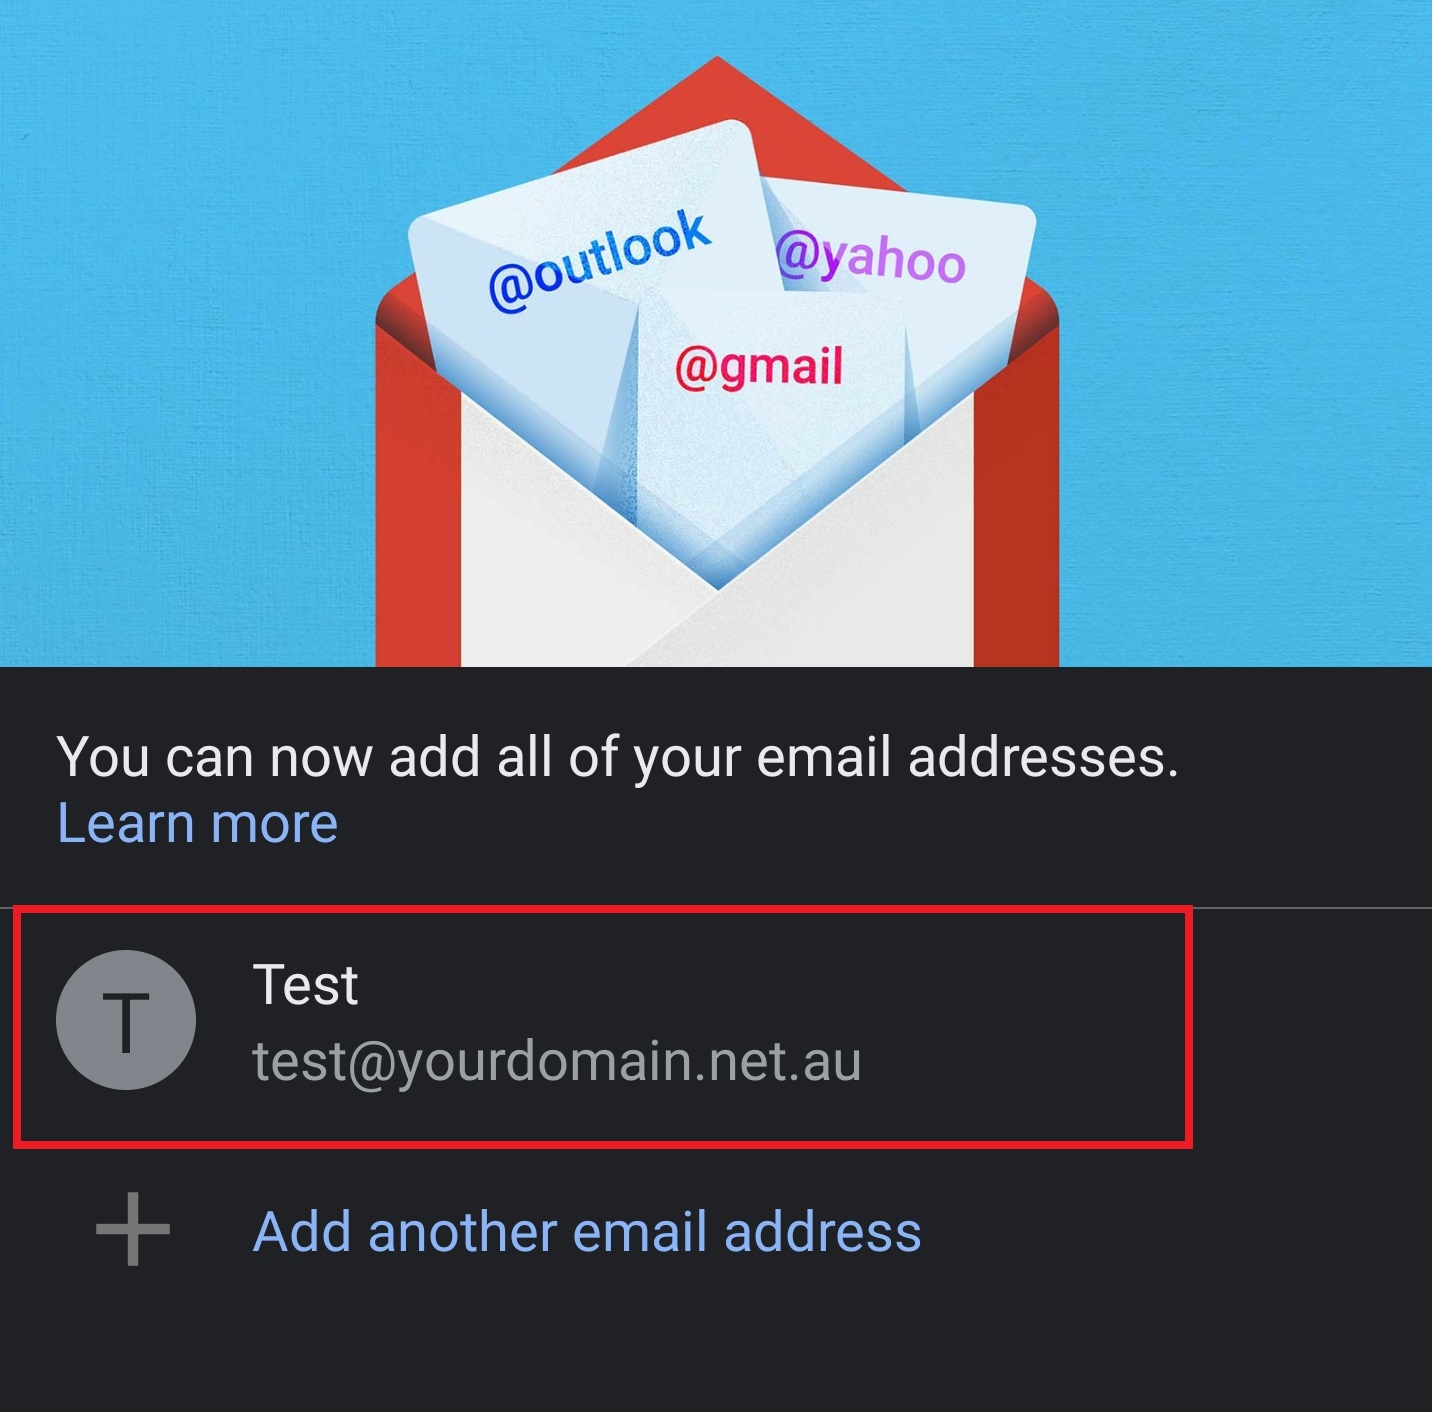
You are also able to add email accounts from within the Gmail app directly, by selecting Add Another Email Address. Otherwise, select the email address to start managing your emails.
Older operating systems
Step 1 - Find the Settings app and open it.
Step 2 - Select Accounts.

Step 3 - Select Add account.
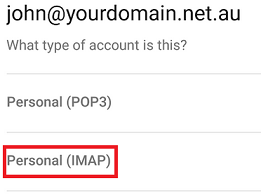
Step 4 - Select Personal (IMAP).
Step 5 - Type your email address and select MANUAL SETUP.
Step 6 - Select Personal (IMAP) again.
Step 7 - Add in the Incoming Server details and select Next.
Step 8 - Add in the same settings again for the Outgoing Server and select Next.
Step 9 - Select Next on this screen.
Step 10 - Type your name in and select Next to finish the setup.
Step 11 - Close the app completely, then open the default Mail app and try sending an email from / to your email address (e.g. from john@yourdomain.net.au to john@yourdomain.net.au). If you can receive emails on the phone, your incoming settings are correct. If you can send mail from the phone, the outgoing mail settings are correct as well.


