How to add GSuite DNS Records
Before you start: Setting up your Google email requires making DNS changes. These normally take between 1-4 hours to take effect, however they can take up to 24 hours in some cases.
When setting up your Google email, you will be asked how you want to verify your domain. First, go
http://ozdns.com.au and check your domain's Nameservers. Make sure they are the same as
our Nameservers. If they aren't, then these instructions may not be relevant to you and you will need to speak with your domain registrar to find out who hosts your domain.
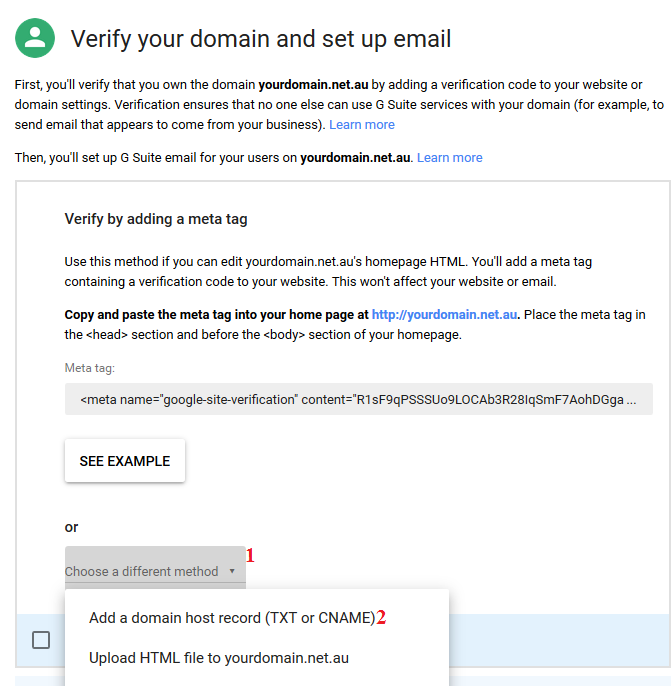
Step 1 - When you see the below screen, click
(1) choose a different method then select
(2) add a domain host record (TXT or CNAME).
 Step 2 -
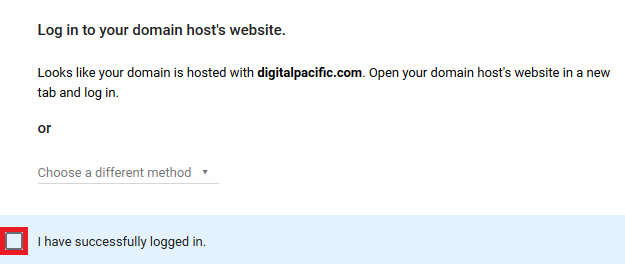
 After you get the below screen,
log into cPanel in a separate window (keep the Google setup window open), go back to the Google window and click on
I have successfully logged in.
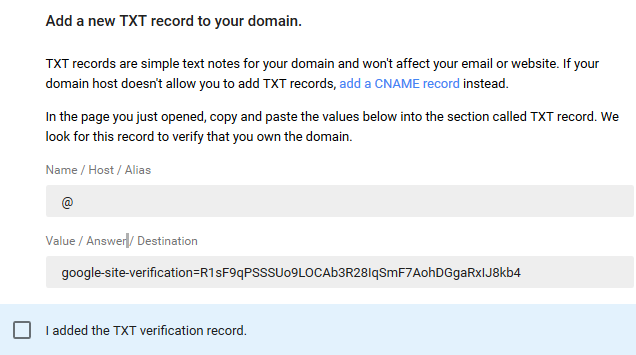
You will then see instructions to
add a TXT record.
 Step 3 -
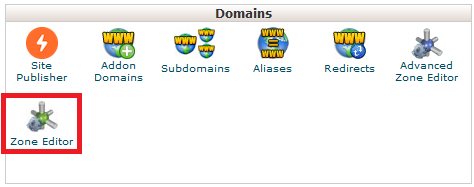
 In cPanel, click on the
Zone Editor icon.
 Step 4 -
 Click on
Manage.
 Step 5 -
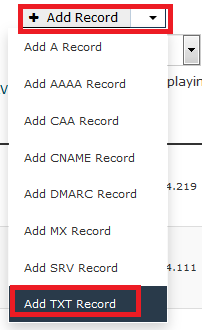
 Click
Add Record then
Add TXT Record.
 Step 6 -
 Add the TXT Data in and click
Add Record. Note that the records can take between 15min and 4hrs to become live.
 Step 7 -
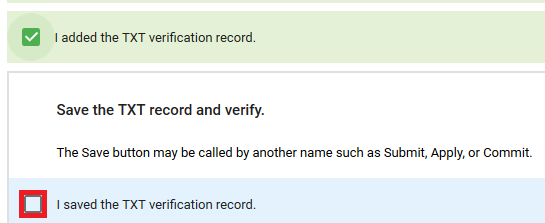
 In the Google window, click
I saved the TXT verification record.
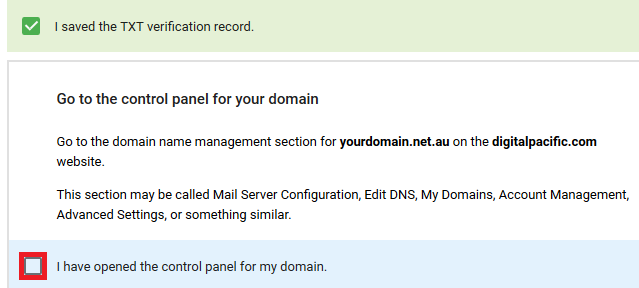
Click
I have opened the control panel for my domain.
You will now see this screen:
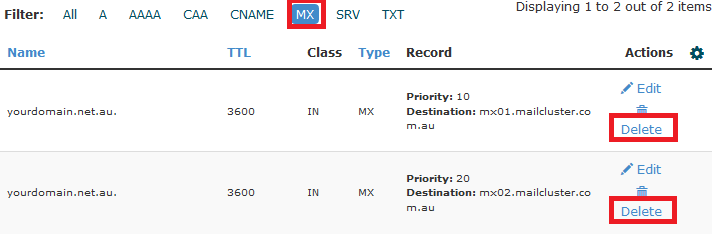
 Step 8 -
 Go back to the cPanel page and click
MX, then
Delete the current records.
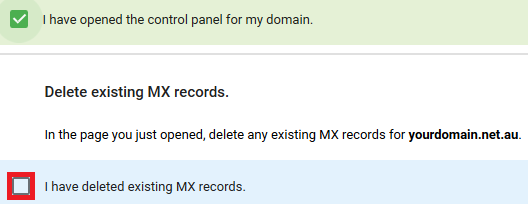
 Step 9 -
 Go back to the Google window and click
I have deleted existing MX records. You will now see this screen.
 Step 10 -
 Go back into cPanel and click
Domains.
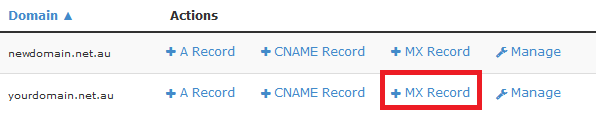
 Step 11 -
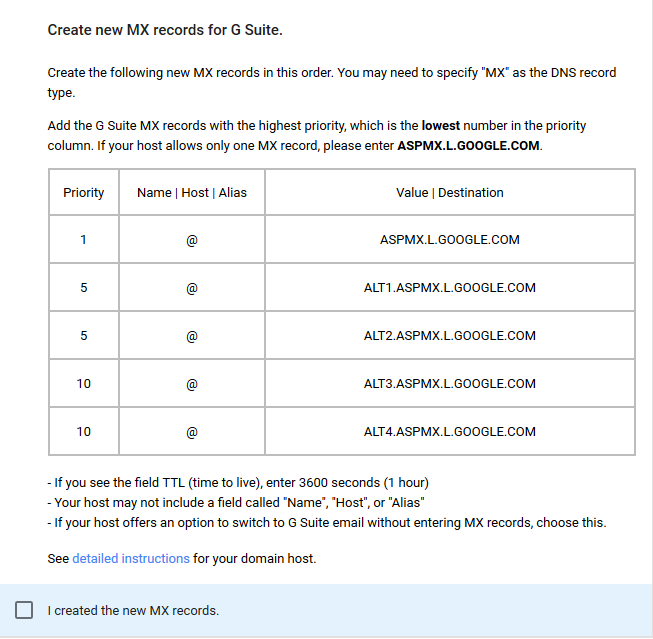
 Add
all the records, one at a time. You only need to worry about the
Priority and
Value | Destination fields.
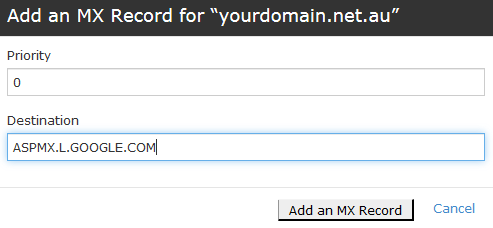
Values for G Suite MX records:
| Name/Host/Alias | Time to Live (TTL*) | Record Type | Priority | Value/Answer/Destination |
|---|
| @ or leave blank | 3600 | MX | 1 | ASPMX.L.GOOGLE.COM. |
| @ or leave blank | 3600 | MX | 5 | ALT1.ASPMX.L.GOOGLE.COM. |
| @ or leave blank | 3600 | MX | 5 | ALT2.ASPMX.L.GOOGLE.COM. |
| @ or leave blank | 3600 | MX | 10 | ALT3.ASPMX.L.GOOGLE.COM. |
| @ or leave blank | 3600 | MX | 10 | ALT4.ASPMX.L.GOOGLE.COM. |
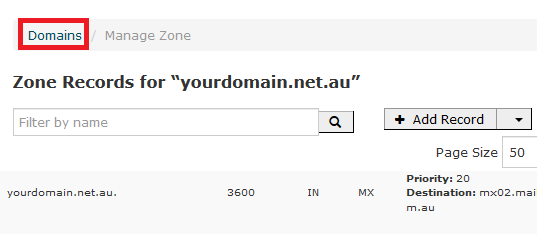
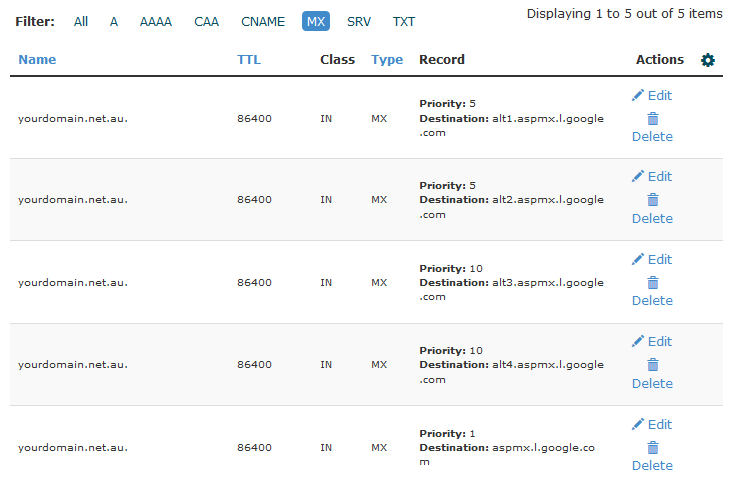
Once complete the records should look like this in the
Manage section (the order doesn't matter as long as all records are there)
 Step 12 -
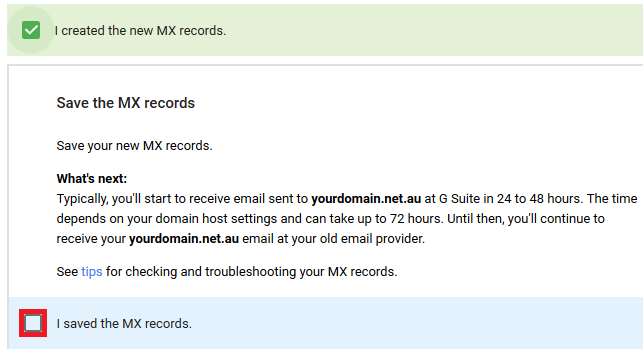
 Go back to the Google window and click
I created the new MX records. You will see this screen.
 Step 13 -
 Click
I saved the MX records and in the following screen click
Verify Domain and set up Email.

You will see this screen.
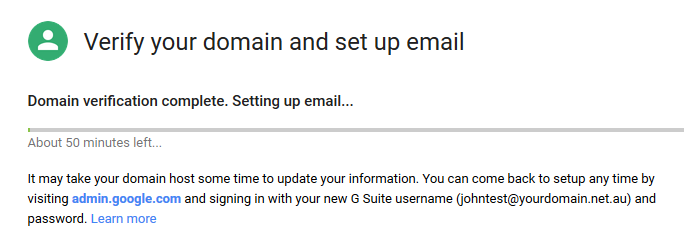
This screen just checks periodically if the MX records have propagated. You can also us
whatsmydns.net to check propagation - enter in your domain name and search for the new MX records.
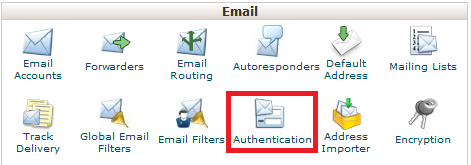
Step 14 - Finally, we need to add Google's SPF record. Go into the main cPanel screen and click
Authentication.
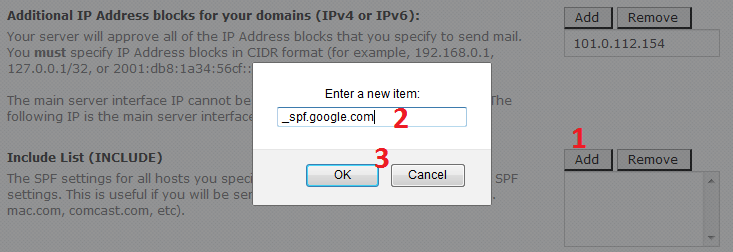
 Step 15 -
 Under
Include List, click
Add, add
_spf.google.com and click
OK.
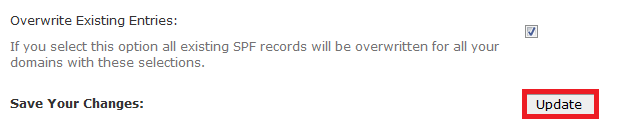
Finally, click
update down the bottom of the page.