Site Builder - Creating Your First Website
This guide takes you through the common steps required to build a website with SiteBuilder.
Please note that the information in this guide is
provided as a suggestion, and we can't provide detailed support for
modifications to a Content Management System. If you require assistance with
this, we'd recommend speaking to your website developer to ensure relevance and
compatibility with your site.
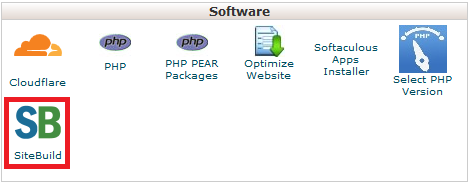
Step 1 - Log into cPanel and click on the
Site Build icon.
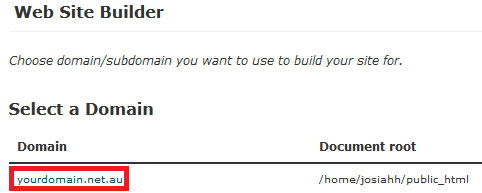
Then click on your domain to access
Site Build Pro.
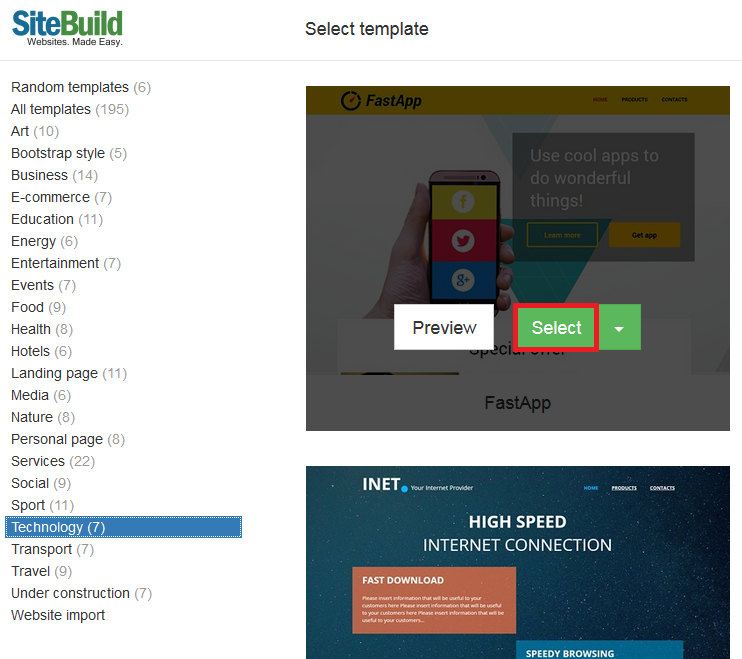
Step 2 - Select A Template
You can chose template categories on the left. Move your mouse over the template you like and click Select to use it.
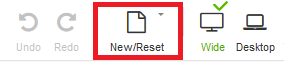
If you want to change the Template, first hover your mouse over the New/Reset button
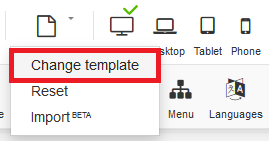
Then click Change template to go back to the Template section screen
Step 3 - Change The Page Text
Double click on any text to change it. Click Done once you've completed the changes.

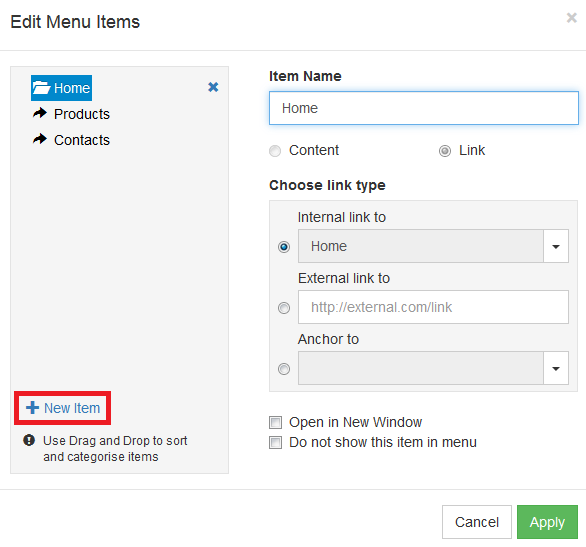
Step 4 - Add A New Page
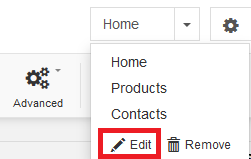
Click on the Menu in the top left.
Then click Edit.
From this menu you can add new pages, delete old pages, rename pages, and perform a number of other actions. Click + New Item to add a new page.
(1)Set the Item Name, then (2) select Link, then (3) click Apply.
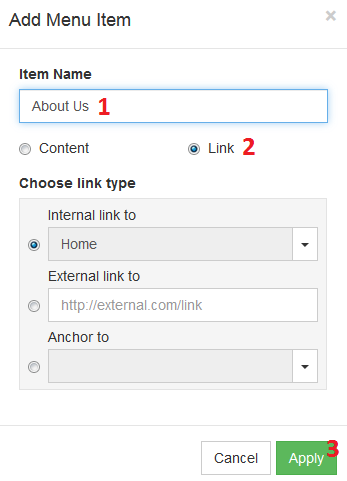
You will now see the About Us link added to the menu. Click on it to go to the page.

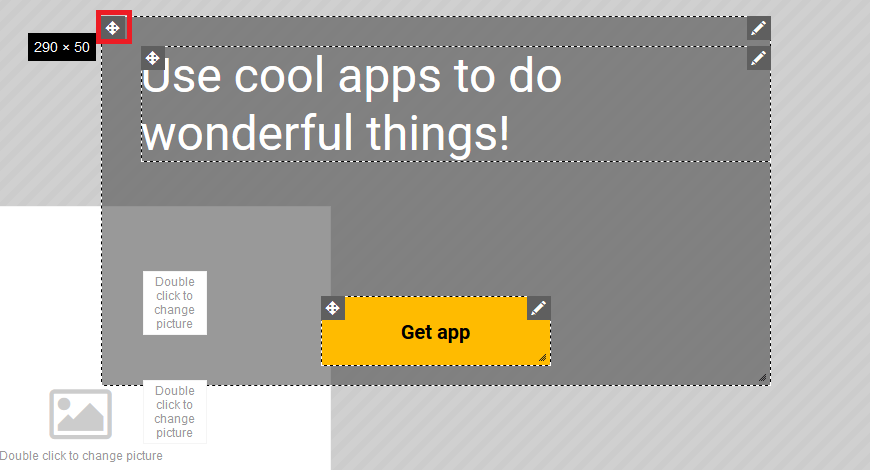
Step 5 - Move and Rearrange Elements
Click in the Element you want to move, then hold the left mouse button down on the 4 arrow icon and drag to move that box.

Alternatively, hold and drag the left mouse button to select multiple boxes. Then hold left click for any of the 4 arrow icons to drag them all together
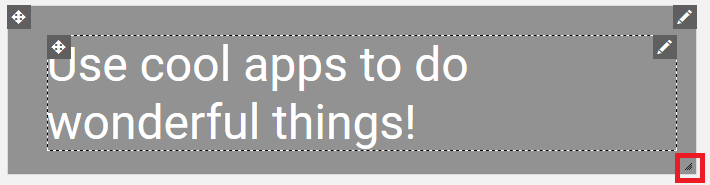
Step 6 - Resize Elements
Move the mouse to the edge of an element so the mouse cursor turns to either a <-> or a up/down arrow, hold the left mouse button and drag to shrink/extend the border of the element. Alternatively, move the mouse to the bottom right of an element, then hold the left mouse and drag to resize it.
Step 7 - Add Images
Double click on one of the image placeholders or images to access the media menu.

(1) Click Add New, then (2) select the image you want to upload, and (3) click Open.

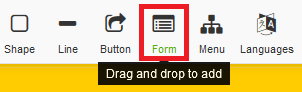
Step 8 - Add a Contact Form
Drag the Form icon onto the part of the web page.
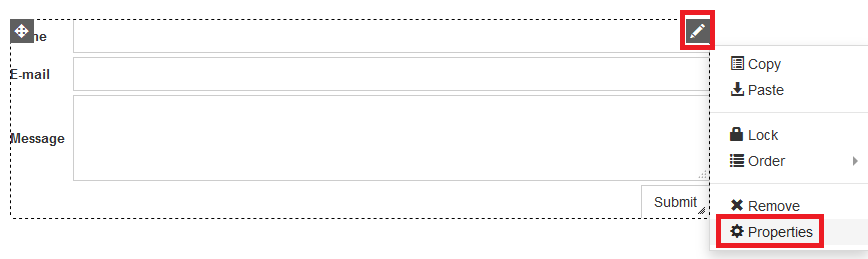
Then click on the Edit icon and click Properties.
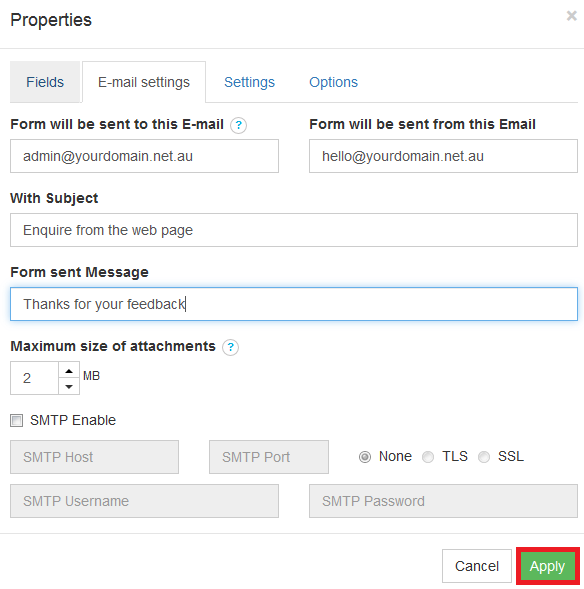
Fill out the form details. If you want the form to be sent out via email address, tick SMTP Enable and fill the details in (they will be the same as that email account's Outgoing Server / SMTP details). Click Apply once done.
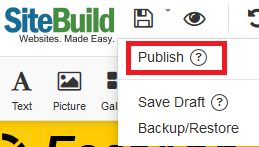
Step 9 - Preview, Backup, and Publish Your New Website
Click Preview to view the website as it would look when live.

You can select Desktop/Tablet/Phone and resize each to see how the site will look on different devices. Click Close once done.

Click on the Publish icon.

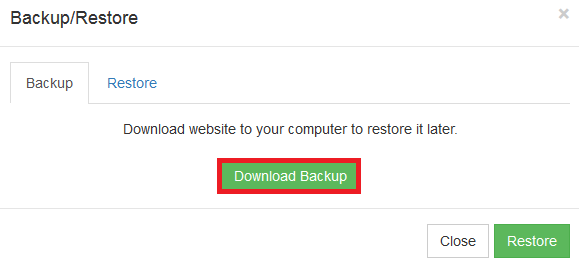
We recommend clicking the Backup/Restore option and downloading a backup of your website before publishing it.
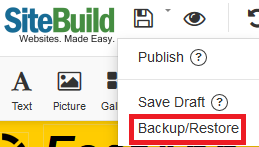
Click Download Backup to download the website backup, and click Close once done.
To Publish the website, just click Publish. If your site's DNS is pointing to our servers, the website should appear straight away (you may just have to refresh your browser or hit the f5 key to force refresh).