How to move a WordPress site from a staging domain to a live one in cPanel
Note: This is an advanced guide and may take 1hr+ to complete. Please note that if the steps are followed incorrectly and the site fails to load, our support team will not be able to investigate or fix any development problems. If required, we could perform a manual migration to carry out these steps on your behalf. You can find more information
in this guide.
The information in this guide is provided as a
suggestion, and we can't provide detailed support for modifications to a
Content Management System. If you require assistance with this, we'd recommend
speaking to your website developer to ensure relevance and compatibility with
your site.
Assumptions:- You have a live site
(yourdomain.net.au), currently loading out of your public_html directory.
- You have a staging site,
currently loading out of a subdomain 'dev.yourdomain.net.au' or a
subfolder 'yourdomain.net.au/test'.
- The DNS for your site is
pointing to our server.
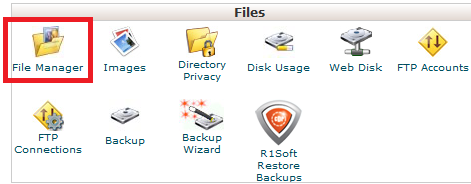
Step 1 - Log into cPanel and open the
File Manager.
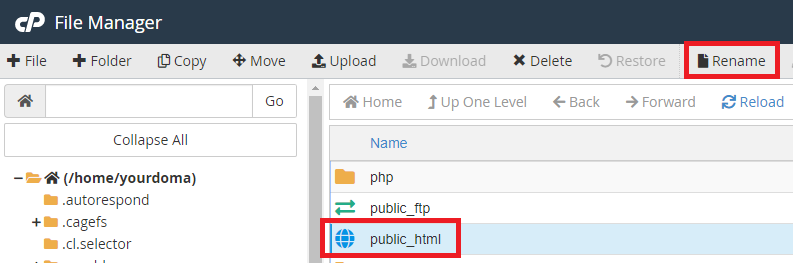
 Step 2 -
 Click on 'public_html' then select
Rename.
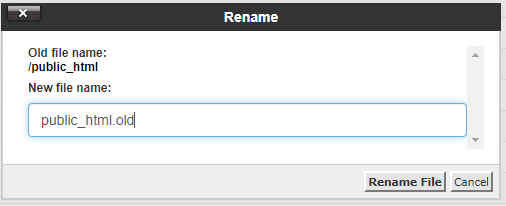
 Step 3 -
 Rename your public_html folder to '
public_html.old'. This will allow you to reinstate your old site files if something goes wrong.
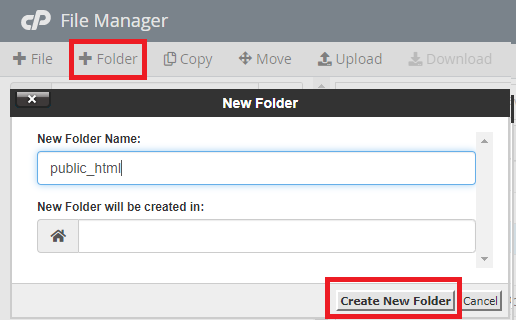
 Step 4 - Create
 a new public_html folder. You will be placing your site files in this folder.
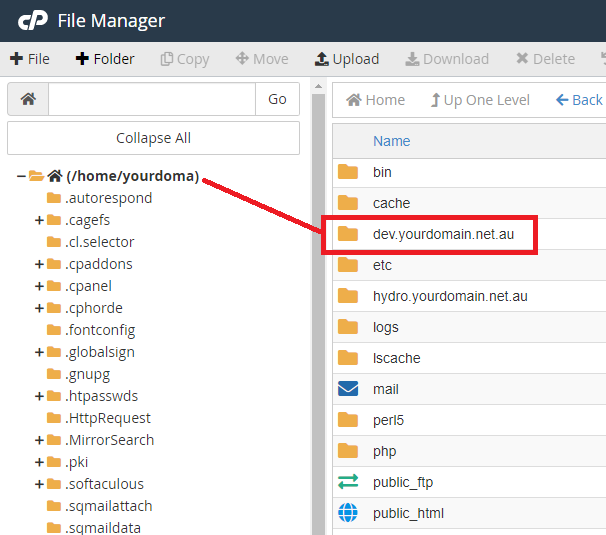
 Step 5 -
 Navigate to the directory that your staging site files are in. In our example, the staging site was in a subdomain '
dev.yourdomain.net.au', so the files were stored in "/home/<cPanel_Username>/dev.yourdomain.net.au/"
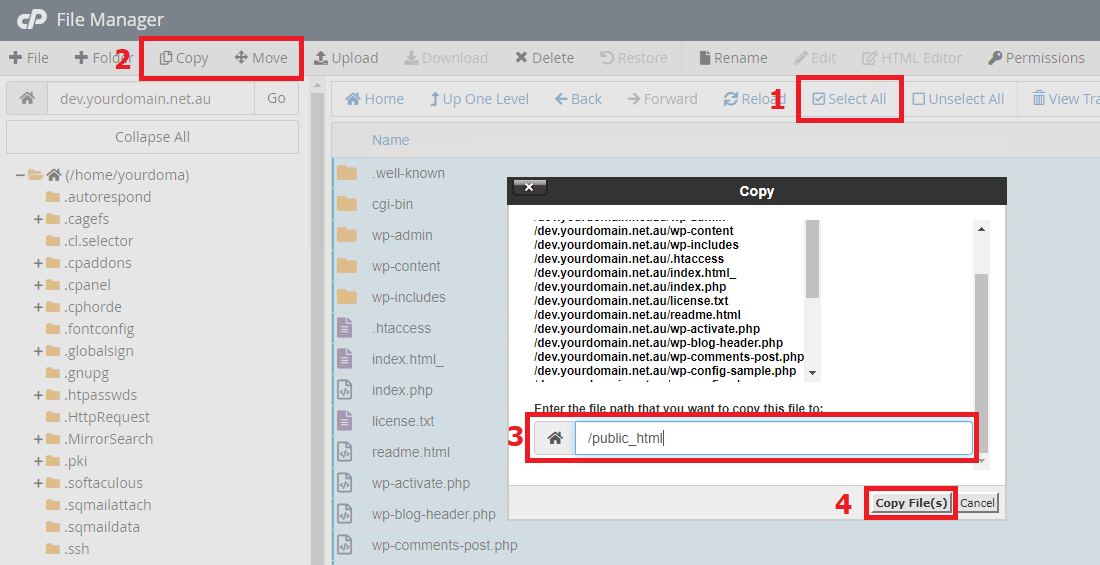
Step 6 - (1) Click Select All inside the staging folder.
(2) Select either Copy or Move. Copy is best if you want to continue developing your site using the staging subdomain later.
(3) Choose the directory to copy to - in this case, the public_html folder.
(4) Select Copy Files(s).
Step 7 - If you are not planning to do any more development on your staging subdomain (i.e. if you selected
Move in the previous step), skip to
Step 13. However, if you plan to use your staging subdomain for further development, read on.
Currently, your new live site still links to your staging database. Thus, if you try to make database updates on your staging site, it will be reflected on the live site. The next few steps go over how to copy the contents of the staging database to a new database, and attach this to the live site. This is preferable if you would like to continue working on your staging site in future.
Step 8 - Navigate to the
public_html folder, select the
wp-config.php file and click on
Edit.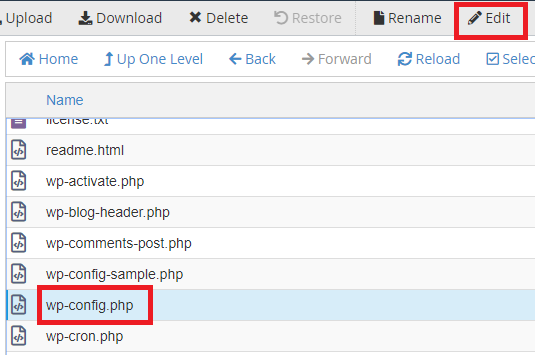
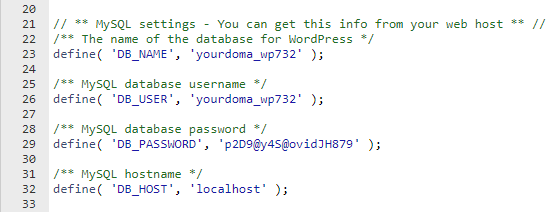
Step 9 - Find the lines relating to the MySQL database username and password, and note down the DB_NAME (you'll need it in
Step 12).
 Step 10 -
 Keep the page with the wp-config file open.
Open a new cPanel Window and use the MySQL Database Wizard to make a new, blank database and user.
Click here for a guide on how to do this. Make sure that you keep the newly created
database name,
username and
password somewhere.
Step 11 - Go back to the
wp-config.php file. Replace the existing database details with those of the database and user you just created.
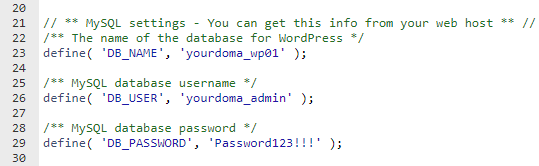
If, for example, you set up a database with the following details:
Database Name: yourdoma_wp01
User: yourdoma_admin
Password: Password123!!!
Then your
wp-config.php file will look like this:
Make sure to hit
Save Changes to update the new database details.
 Step 12 - Export
 the old database into an .sql file, then
Import it into the new, blank database you created. You can use
this guide to export and import databases.
Step 13 - Finally, you will need to update the primary URL associated with the Wordpress installation (from, for example, dev.yourdomain.net.au to yourdomain.net.au).
Click here for a guide on doing that.
Note that the login to the admin section will change. If you previously accessed the admin panel using, for example, dev.yourdomain.net.au/wp-admin, the new link will be yourdomain.net.au/wp-admin. Try /wp-login.php if you get an error when going to /wp-admin.
Your Staging site should now be loading as your live site. Test your site in an uncached browser, and confirm that it works correctly. If your site does not load correctly, take the following steps to revert your changes:
- Access the cPanel File Manager.
- Rename the "public_html" to "public_html.staging".
- Rename "public_html.old" to "public_html".
- Contact your web developer to confirm the reason the site does not load correctly, and work with them to resolve it.
If you find your WordPress website is running slowly,
click here for our guide on speeding up WordPress.
You might also want to
set up WordPress with SSL.
Click here for a guide on how to do that.
For more tutorials on
website development and Wordpress troubleshooting, view our List of Wordpress Guides.


