How to disable MFA / Security Defaults on Office 365
Security Defaults are a series of settings enabled by default on your Microsoft Office 365 account, to provide greater security. Every user is required to log in using Multi-Factor Authentication (MFA). Security Defaults also blocks connections from legacy email clients and
disallows the use of email protocols like IMAP, POP3 and SMTP. For more information on what these Security Defaults do, see
Microsoft's documentation.
If you need to connect without Multi-Factor Authentication or disable Security Defaults for another reason, you can do so as follows:
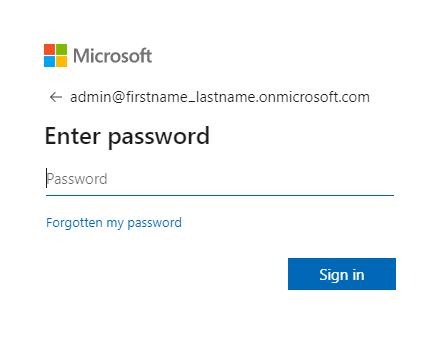
Step 1 - Log into your Office 365 management area as shown in
this guide.
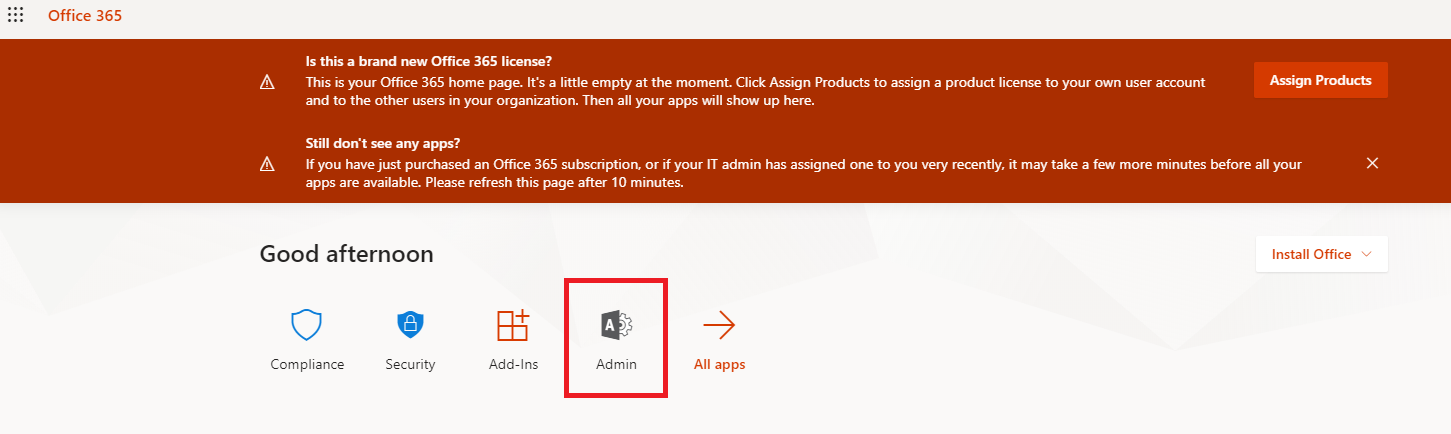
 Step 2 -
 Click on
Admin.
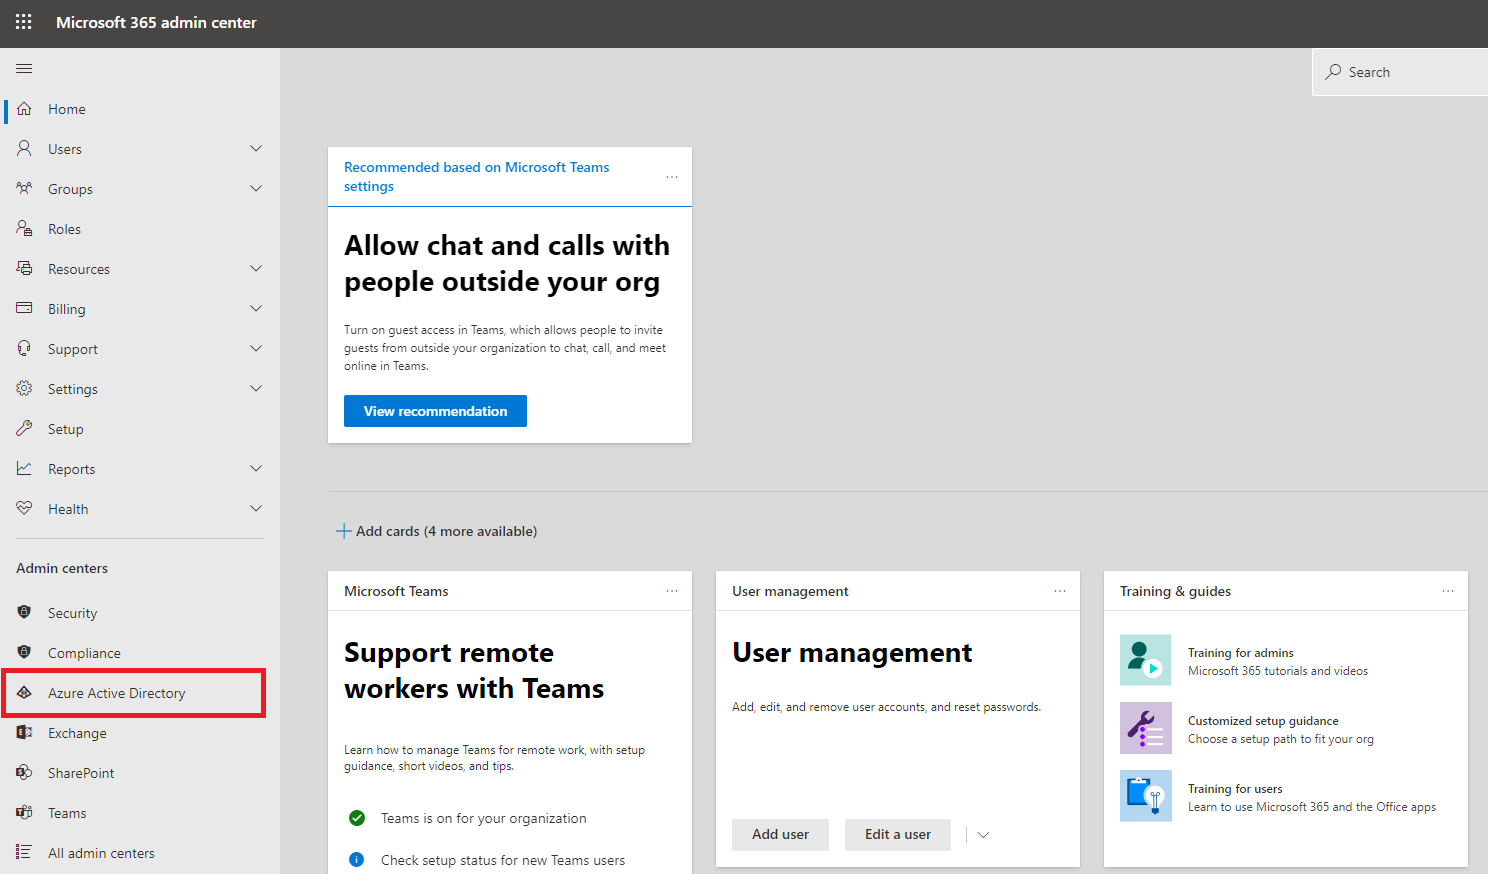
 Step 3 -
 Click on
Azure Active Directory in the left hand column. If it's not present for you, select
Show All to expand the menu.
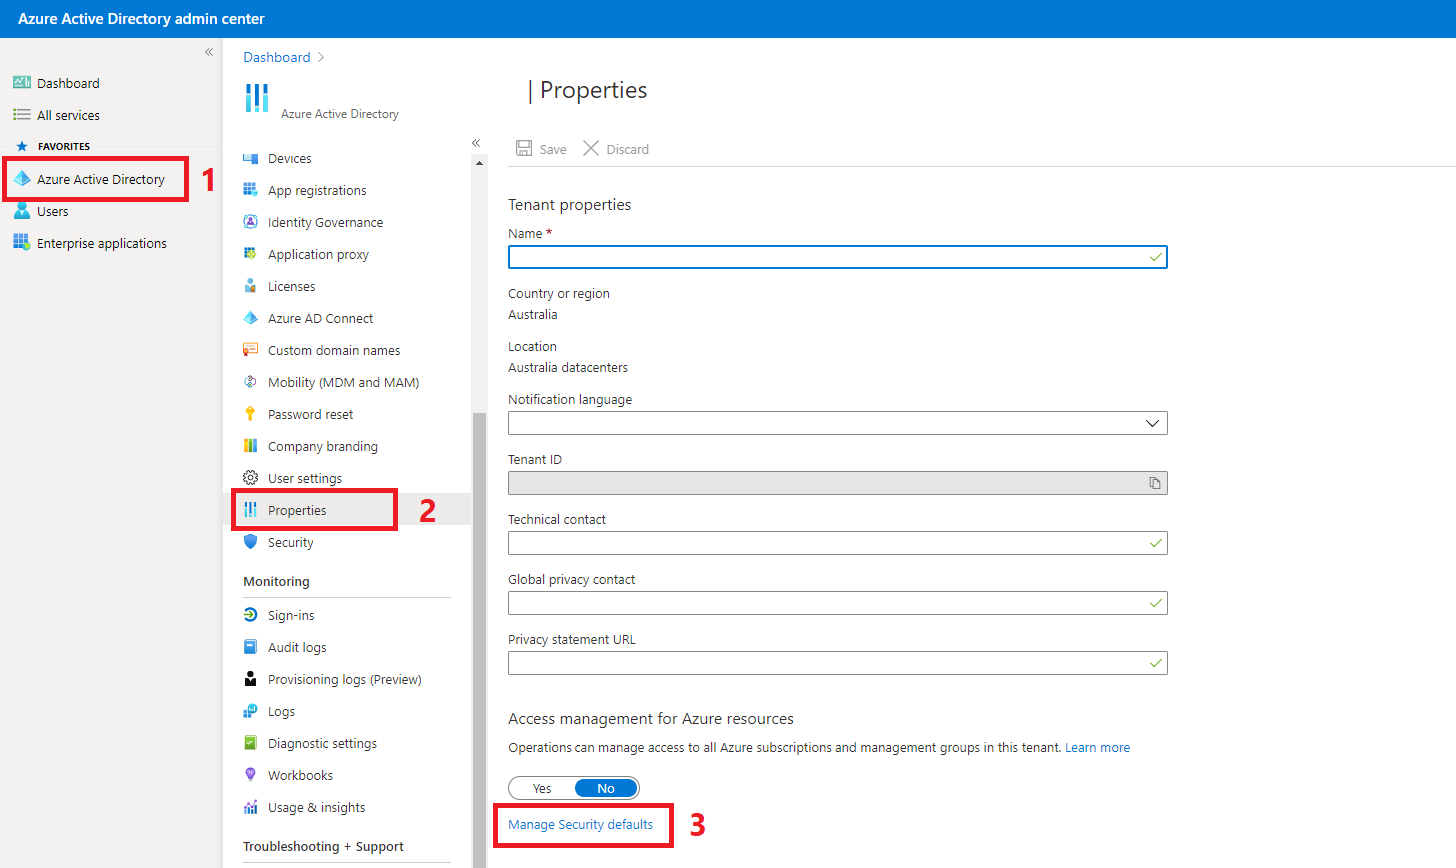
 Step 4 -
(1)
Step 4 -
(1) Select
Azure Active Directory again.
(2) Select
Properties.
(3) Select
Manage Security Defaults.
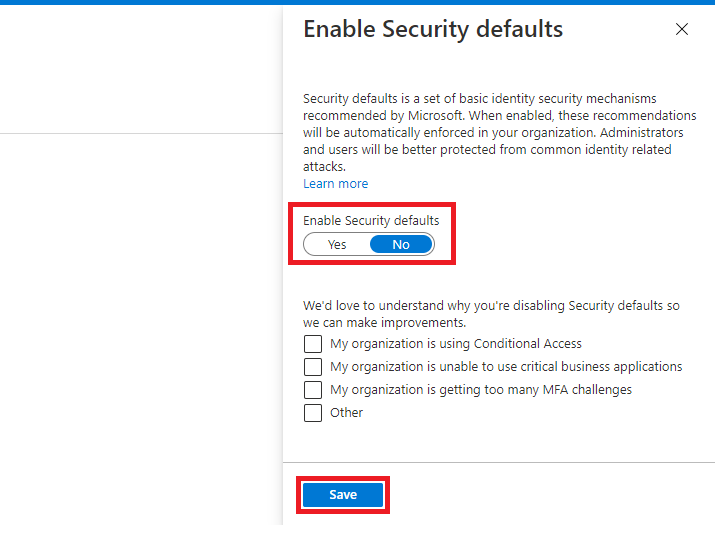
 Step 5 -
 Select
No under
Enable Security Defaults, then select
Save.
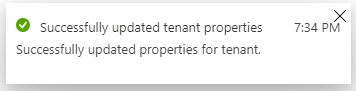
 Step 6 -
 You will get a Success message indicating that Security Defaults has been disabled.
At this point, you will no longer be prompted to set up Multi-Factor Authentication when logging in. To authenticate with Legacy email clients, you will also need to follow
Microsoft's guide here to manually re-enable IMAP and SMTP. If you have already set up Multi-Factor Authentication and you wish to remove it, follow these additional steps:
Step 7 - Return to the Office 365 Admin area and select
Users then
Active Users in the left menu. Select
Multi-Factor Authentication on the Users page.
 Step 8 -
 Click on the
Select All box, then click on
Enable.
Usually if MFA is enabled, it will display an 'Enabled' status next to the user. MFA that was created when Security Defaults was active does not update this section properly. In order to disable MFA, we will need to enable it and then disable it in this section.
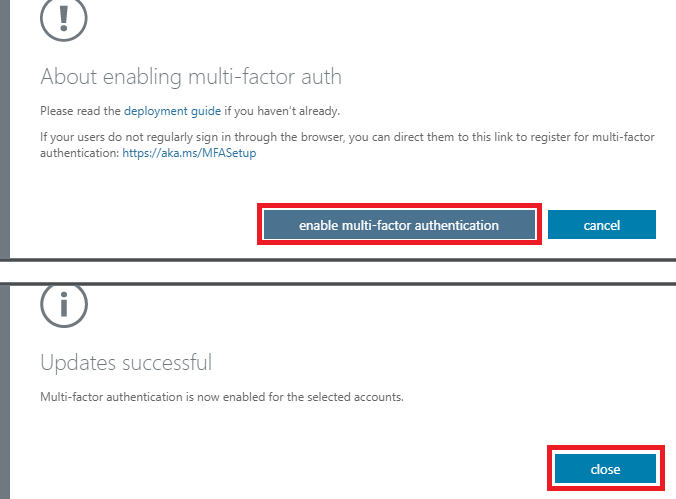
 Step 9 -
 Select
Enable multi-factor authentication, then
close.
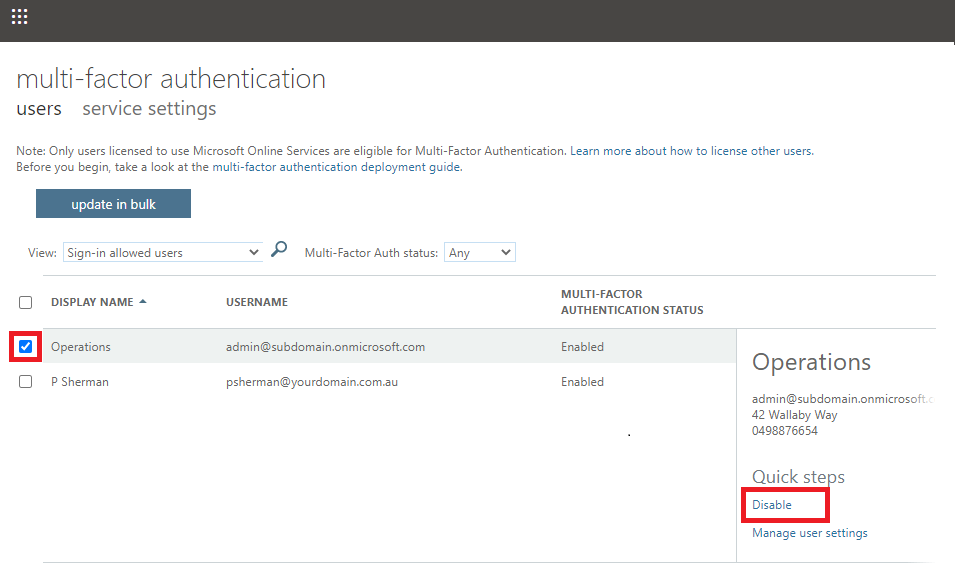
 Step 10 -
 Select the
O365 account(s) you want to disable MFA for, then select
Disable.
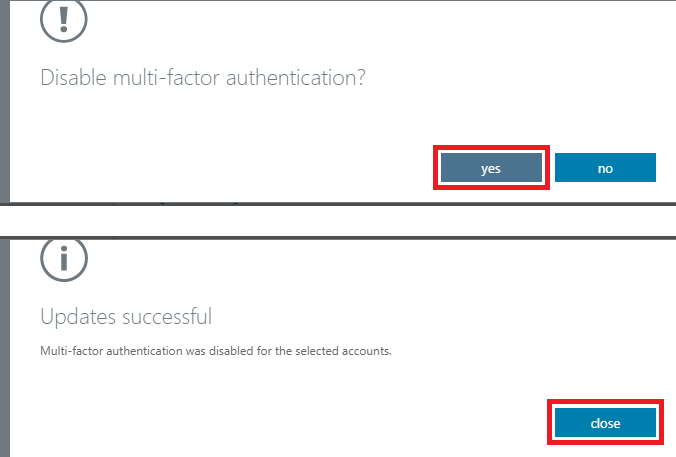
 Step 11 -
 Select
Yes then
Close.
 For more information and tutorials on Office 365, see our Getting Started guide.


