How to Enable AutoSSL (Let's Encrypt) in cPanel and Plesk
You can follow this guide to install a free, auto-renewing SSL Certificate on your hosting. Most of our hosting is cPanel, so if you're not sure what platform you use we'd recommend starting there.
Enabling AutoSSL in cPanel
The Let's Encrypt software that generates free SSL Certificates should be enabled automatically by default. However if it isn't, there is a way to enable it manually from cPanel.
Note: Let's Encrypt SSL certificates may not be suitable for you. Click here for our guide on comparing free vs paid SSL certificates.
Step 1 - Log into cPanel and select SSL/TLS Status.

Step 2 - Make sure the domains/subdomains you want an SSL for are included and click Run AutoSSL. You may have to wait a few minutes for the software to complete validation and apply the certificate.

Once the process is complete, the page will if each domain/subdomain is validated, and if not there will be an error message explaining why.
Step 3 - To check whether the certificate has been successfully installed on your domain, you can use this external tool. If your site is still showing "Not Secure" or loads without a padlock, you may be serving Mixed Content. You can follow this guide to force the website to load using the SSL Certificate.
Troubleshooting steps
Let's Encrypt certificates can only be validated by file-based or DNS-based authentication. These steps help you make sure the SSL can validate properly:
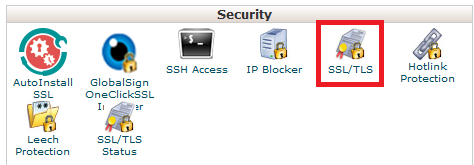
Step 1 - Let's Encrypt certificates will not install over the top of other certificates, even self-signed or expired ones. To ensure there are no SSL Certificates already present, navigate to the SSL/TLS section of cPanel:

Then click on Manage SSL Sites.

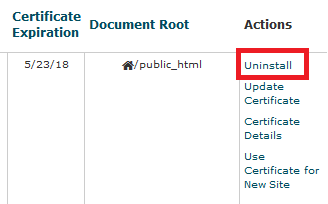
Then Uninstall any old or invalid certificates, and click run AutoSSL again in SSL/TLS Status.

Step 2 - If the chosen domain/subdomain has "Include during AutoSSL" under the Certificate Status, click the button to enable it. Once enabled the option will change to "Exclude from AutoSSL".

Step 3 - Make sure the website is loading from our server. Use a DNS checker like whatsmydns.net to make sure the IP address of the A record is the same as your server IP. You can find your server IP in the "Hosting Account Information" email we sent when you set up the account. If the IPs don't match, it means your site isn't loading from our server and you'll need to contact your website hosts to install an SSL instead.
Step 4 - If your A records are pointing to us but your Nameservers are external, use whatsmydns.net to check if there are any AAAA records present. Some DNS managers add AAAA records that don't point anywhere, which interferes with AutoSSL's ability to validate the domain. Remove any AAAA records that you see and test again.
Step 5 - Sometimes code in your site interferes with the validation steps. To resolve this, add this code to the top of your .htaccess file:
RewriteCond %{REQUEST_URI} !^/[0-9]+\..+\.cpaneldcv$
RewriteCond %{REQUEST_URI} !^/\.well-known/acme-challenge/.+$
RewriteCond %{REQUEST_URI} !^/\.well-known/acme-challenge/[0-9a-zA-Z_-]+$
RewriteCond %{REQUEST_URI} !^/\.well-known/pki-validation/[A-F0-9]{32}\.txt(?:\ Comodo\ DCV)?$
Step 6 - If you are getting notifications with the message "An error occurred the last time AutoSSL ran", you can exclude the domains in question by following this guide.
Step 7 - If the "Run AutoSSL" button isn't present on your CPanel account, this option is not enabled in your Feature List. We would recommend speaking to your reseller or System Administrator to resolve this.
Enabling AutoSSL in Plesk
The Let's Encrypt software that generates free SSL Certificates should be enabled automatically by default. However if it isn't, there is a way to enable it manually from Plesk.
Note: Let's Encrypt SSL certificates may not be suitable for you. Click here for our guide on comparing free vs paid SSL certificates.
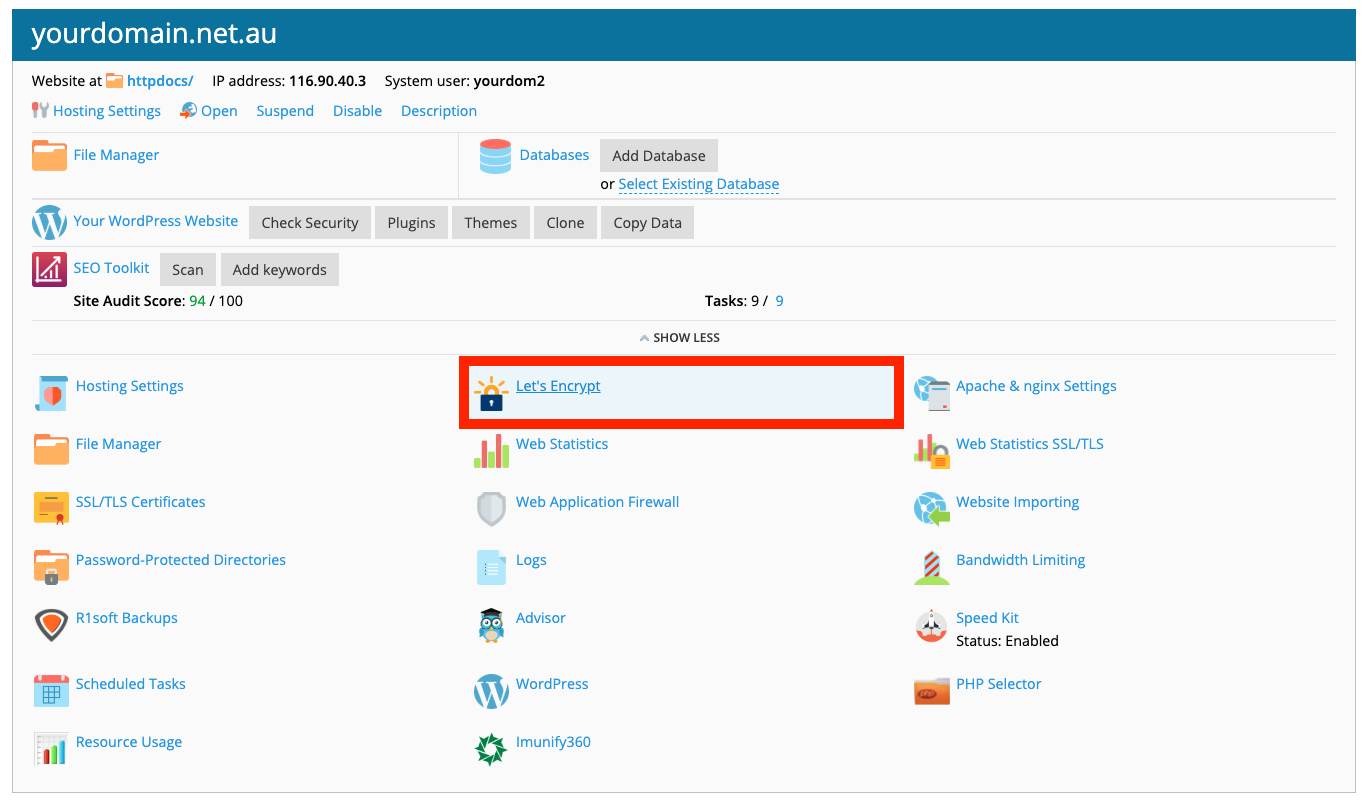
Step 1 - Log into Plesk and click on Let's Encrypt.

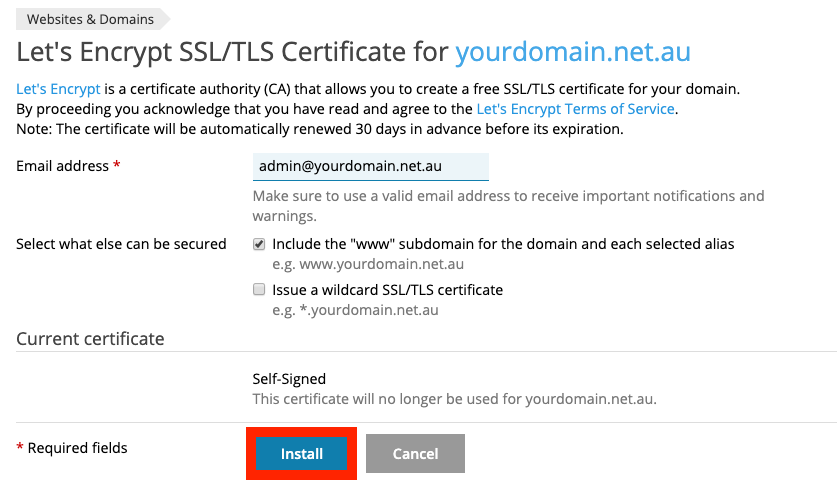
Step 2 - Press Install (this button could be Renew if you have Let's Encrypt already installed but wish to renew the certificate).

Step 3 - To check whether the certificate has been successfully installed on your domain, you can use this external tool. If your site is still showing "Not Secure" or loads without a padlock, you may be serving Mixed Content. You can follow this guide to force the website to load using the SSL Certificate.
Troubleshooting steps
Let's Encrypt certificates can only be validated by file-based or DNS-based authentication. These steps help you make sure the SSL can validate properly:
Step 1 - Let's Encrypt certificates will not install over the top of other certificates, even self-signed or expired ones. To ensure there are no SSL Certificates already present, Uninstall any old or invalid certificates by following this guide, and click Install again.
Step 2 - Make sure the website is loading from our server. Use a DNS checker like whatsmydns.net to make sure the IP address of the A record is the same as your server IP. You can find your server IP in the "Hosting Account Information" email we sent when you set up the account. If the IPs don't match, it means your site isn't loading from our server and you'll need to contact your website hosts to install an SSL instead.
Step 3 - If your A records are pointing to us but your Nameservers are external, use whatsmydns.net to check if there are any AAAA records present. Some DNS managers add AAAA records that don't point anywhere, which interferes with AutoSSL's ability to validate the domain. Remove any AAAA records that you see and test again.
Step 4 - Sometimes code in your site interferes with the validation steps. To resolve this, add this code to the top of your .htaccess file:
RewriteCond %{REQUEST_URI} !^/[0-9]+\..+\.cpaneldcv$
RewriteCond %{REQUEST_URI} !^/\.well-known/acme-challenge/.+$
RewriteCond %{REQUEST_URI} !^/\.well-known/acme-challenge/[0-9a-zA-Z_-]+$
RewriteCond %{REQUEST_URI} !^/\.well-known/pki-validation/[A-F0-9]{32}\.txt(?:\ Comodo\ DCV)?$
.


