Install a CMS using Softaculous
Before you start: All these guides will require you to
log into cPanel. Softaculous is installed by default on our shared, reseller and managed VPS products. If you do not have the option available, please feel free to reach out to our support team about getting Softaculous enabled on your hosting.
Install Drupal using Softaculous
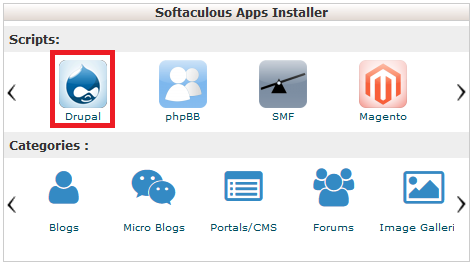
Step 1 - Log into cPanel then click on the Drupal icon (you may have to hover over the > icon to scroll and find it).
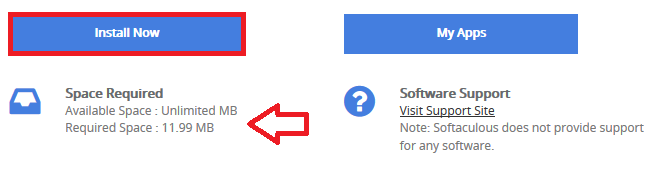
Step 2 - Check you have enough space and click Install Now.
Step 3 - Set your Protocol, Domain, In Directory and CRON Job.
Choose Protocol: If you're not sure or don't have an SSL certificate, leave this as http. It can always be changed later from Drupal's control panel.
Choose Domain: Select the domain you wish to install into. Here you can select subdomains or add-on domains.
In Directory: Leave this default/blank unless you're installing Drupal in a subfolder, eg: yourdomain.net.au/testsite/
CRON Job: Leave this as default unless you're an experienced developer and have specific requirements for the CRON.

Step 4 - Input your website's name.

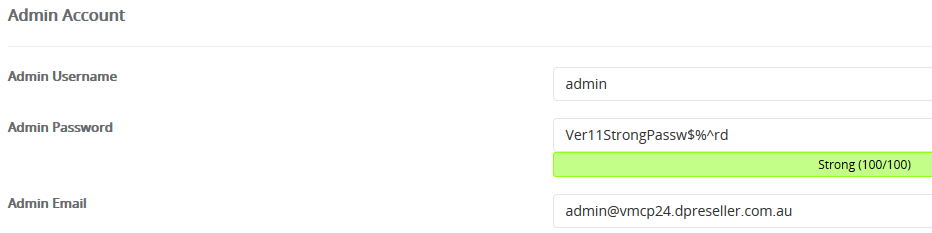
Step 5 - Set your Admin Username, Password, Name and Email:
Admin Password: Make sure your password strength is strong, and that you're not reusing a previous password.
Admin Email: Set this to your main email. It will be used if you need to reset your Drupal password and for receiving important notifications.
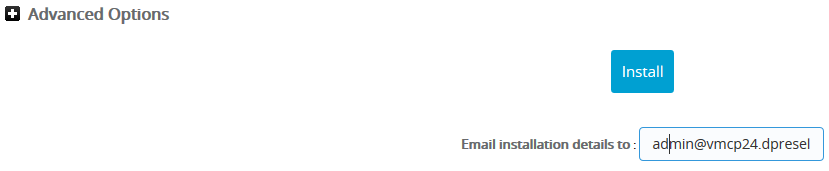
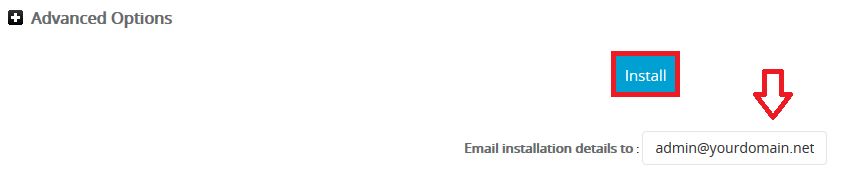
Step 6 - Put your primary email in the "Email installation details to:" field and hit Install.
Note: Unless you're an experienced developer we recommend leaving the Advanced Options as their defaults.
Install Joomla using Softaculous
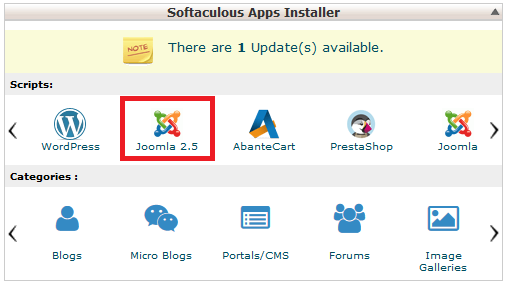
Step 1 - Log into cPanel then click on the Joomla icon:
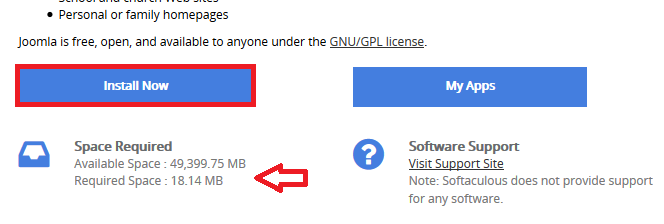
Step 2 - Check you have enough free space and click Install Now:
Step 3 - Select the version you want to install (Note: We always recommend using the latest version, as it's often faster and more secure).

Step 4 - Select the protocol. If you're not unsure or don't have an SSL certificate leave this as http. It can always be changed later from Joomla's control panel.

Step 5 - Select the domain you wish to install into. Here you can select subdomains or add-on domains.

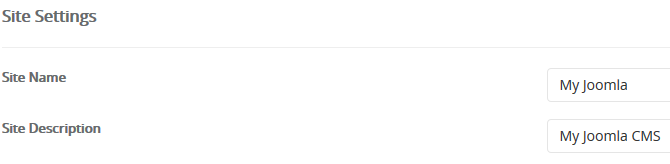
Step 6 - Set the Name and a short description of the site. This can be changed at a later date.
Step 7 - Set your username, real name, password and email. Please make sure you use a complex password to guard against hackers. Also, make sure you set a real email address which you have access to, as this can be used to reset your password.

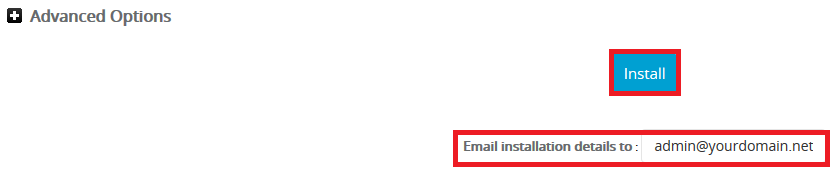
Step 8 - Put your email address in and hit Install.
Note: For Joomla, unless you're an experienced developer, it's best to leave the Advanced Options as their default values.
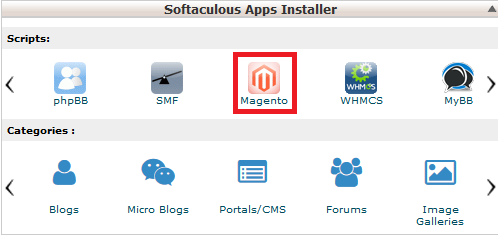
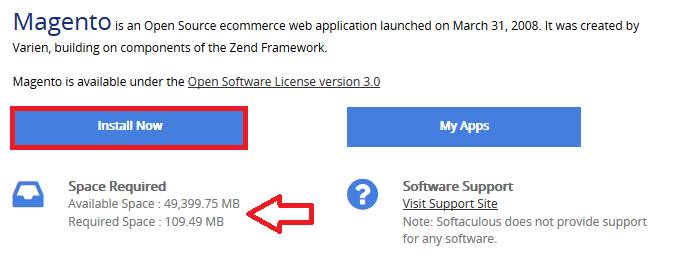
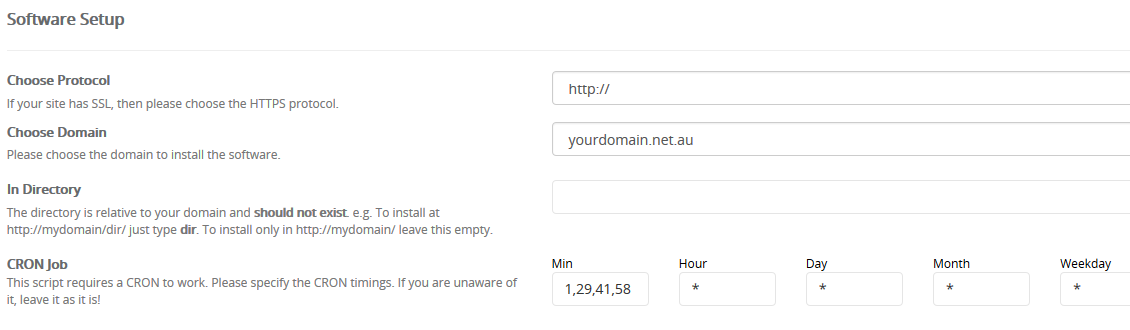
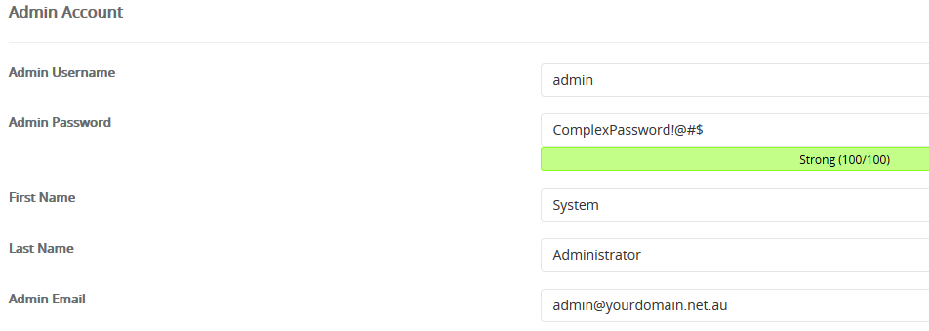
Install Magento using Softaculous
Note: Due to its high CPU/RAM Server requirements, Magento 2 and above aren't available on our Personal and Business hosting plans.
Step 1 - Log into cPanel then click on the Magento icon (you may have to scroll right by hovering your mouse over the > icon )
Step 2 - Check that you have enough space and hit Install Now.
Step 3 - Set your Protocol, Domain, In Directory and CRON Job
Choose Protocol: If you're not sure or don't have an SSL certificate, leave this as http. It can always be changed later from Magento's control panel.
Choose Domain: Select the domain you wish to install into. Here you can select subdomains or add-on domains.
In Directory: Leave this default/blank unless you're installing Magento in a sub folder, eg: yourdomain.net.au/testsite/
CRON Job: Leave this as default unless you're an experienced developer and have specific requirements for the CRON.
Step 4 - Set your Admin Path. In this example, the admin area of the website will be accessed using yourdomain.net/magento-login

Step 5 - Set your Admin Username, Password, Name and Email:
Admin Password: Make sure your password strength is strong to protect against hackers
Admin Email: Set this to your main email. It will be used if you need to reset your Magento password and get important notifications
Step 6 - Put your primary email in the "Email installation details to:" field and hit Install.
Note: Unless you're an experienced developer, we recommend leaving the Advanced Options as their default values.
Install PrestaShop using Softaculous
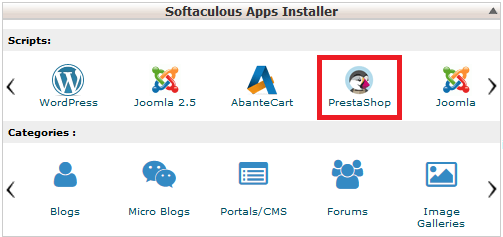
Step 1 - Log into cPanel then click on the PrestaShop icon.
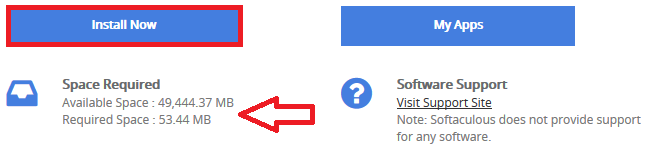
Step 2 - Check that you have enough disk space and click Install Now.
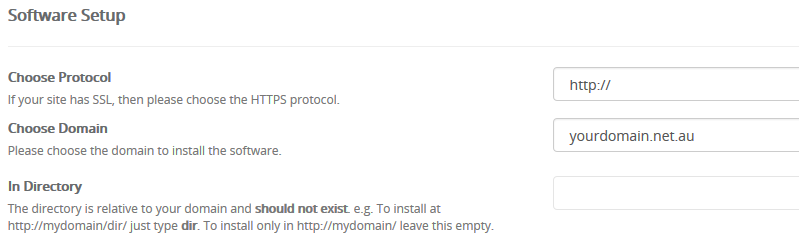
Step 3 - Set your Protocol, Domain and In Directory
Choose Protocol: If you're not sure or don't have an SSL certificate leave this as http. It can always be changed later from PrestaShop's control panel.
Choose Domain: Select the domain you wish to install into. Here you can select subdomains or add-on domains
In Directory: Leave this default/blank unless you're installing PrestaShop in a subfolder, eg: yourdomain.net.au/testsite/
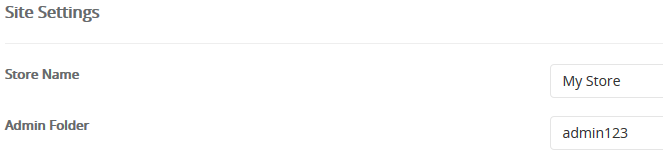
Step 4 - Set your store name and admin folder. In this example, the admin area of the website will be accessed using yourdomain.net/admin123
Step 5 - Set your Admin Username, Password, Name and Email:
Admin Password: Make sure your password strength is strong to protect against hackers
Admin Email: Set this to your main email. It will be used if you need to reset your PrestaShop password and for receiving important emails.

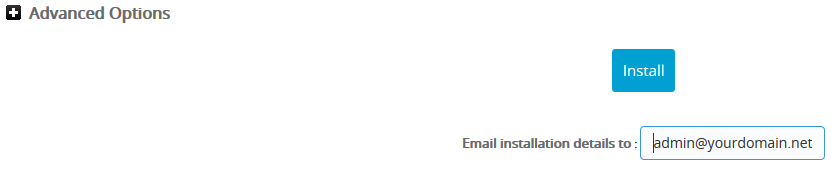
Step 6 - Put your primary email in the "Email installation details to:" field and hit Install.
Note: Unless you're an experienced developer, we recommend leaving the Advanced Options as their default values.
Install Wordpress using Softaculous
You can find more information on installing Wordpress in this guide. We also have a list of other guides for Wordpress, which can be found here.


