Create a test or staging site for Wordpress using Softaculous
If you're about to make some big changes on your Wordpress site or install a new plugin or other software on it, you can easily create a staging site to test new updates before making the changes to the live site. Just note that this guide only applies if WordPress was installed using Softaculous. If it wasn't, you won't see the WordPress install in Softaculous. However, you'll still be able to
manually create a staging site.
Before you start - Choose what you'd like your staging site to be called. Many people will use a subdomain like 'dev.yourdomain.com', but you can also use subfolders like 'yourdomain.com/test'. If you plan to use a subdomain, you will need to
create a subdomain in cPanel before following the rest of this guide.
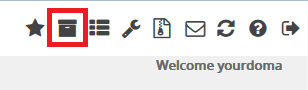
Step 1 - Log into cPanel and click on the
Softaculous icon.
 Step 2 -
 In the top right, click on the "All Installations" icon.
 Step 3 -
 Click on the Clone icon.
 Step 4 -
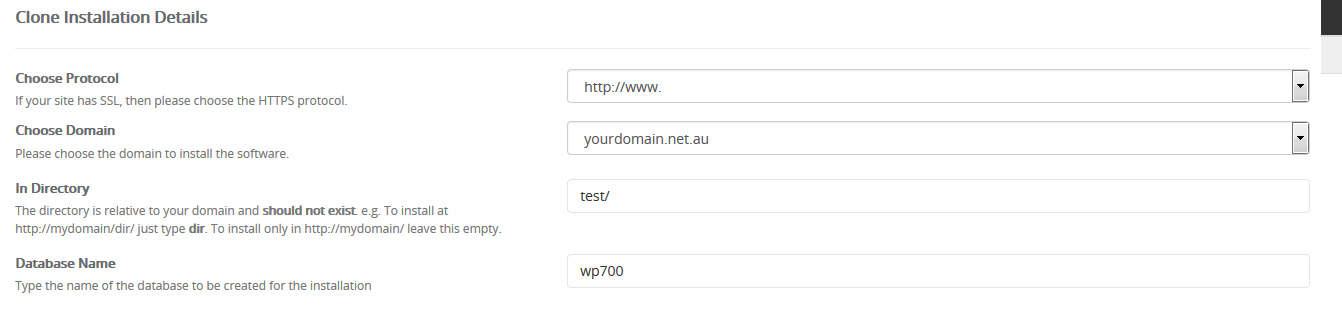
 Input the settings here as described below:
Choose Protocol: If your Wordpress site has SSL enabled, choose https:// otherwise choose http:// (This can easily be changed later through Wordpress).
Choose Domain: Select the domain for the site. If you plan to use a
subdomain, you can choose it in this list.
In Directory: Set the directory for the install. If you plan to use a
subdomain (dev.yourdomain.com.au), leave this field blank. If you plan to use a
subfolder (yourdomain.com/test), enter 'test'.
Database Name: Leave this as the default value.
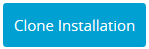
 Step 6
 - Scroll down and hit the Clone Installation button
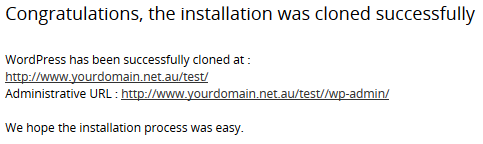
 Step 7
 - Once complete, you will see this screen. The login username and password will be the same as they were for the original install.
After you make your changes on the staging site and want to bring this live, you can follow
this guide to do so.
For more tutorials on
website development and Wordpress troubleshooting, view our List of Wordpress Guides.


