Email Setup for Outlook
Before you start:
A) Make sure you know the correct email settings for your account.
You can find these here.
B) If you don't have your email password, you can find it
here.
Outlook 365 (2016 or newer)
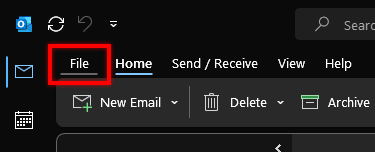
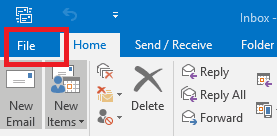
Step 1 - Click on File.
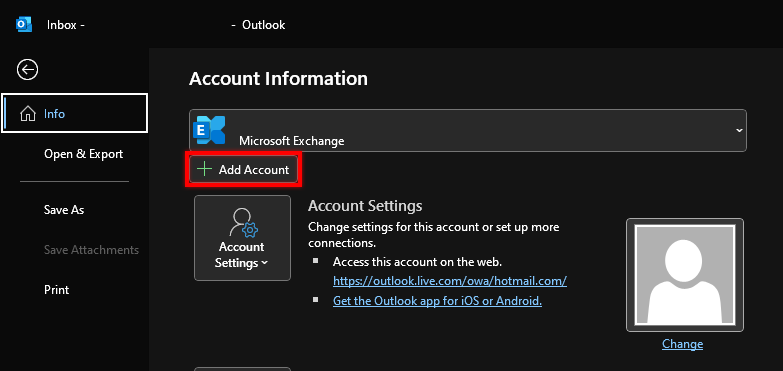
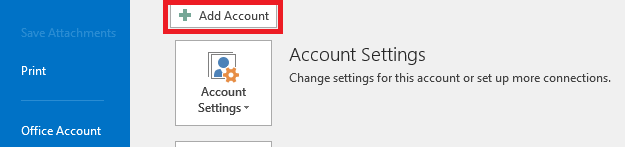
Step 2 - Click on Add Account.
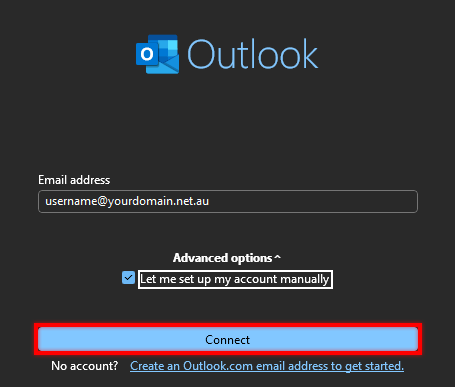
Step 3 - Add your email address, select Advanced Options and tick Let me set up my account manually then click Connect.
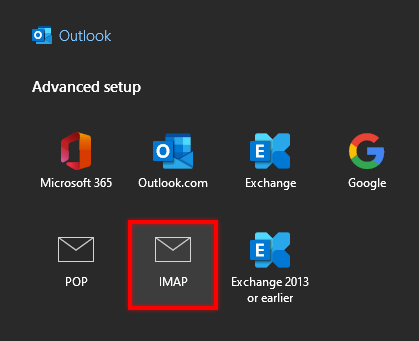
Step 4 - Select IMAP as the account type.
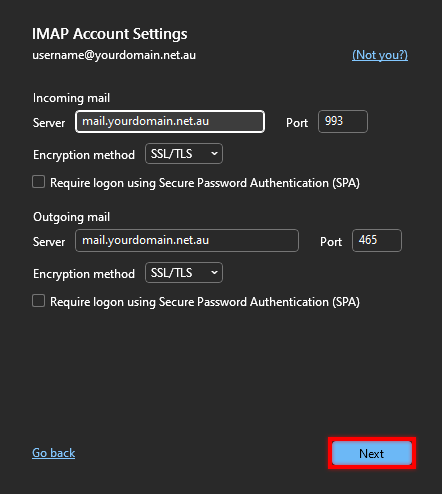
Step 5 - Add your mail settings and click Next.
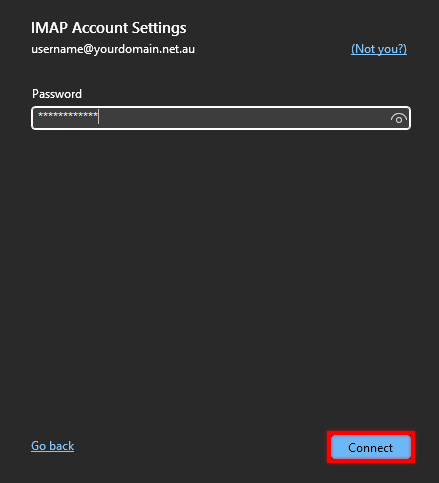
Step 6 - Add your email password and click Connect.
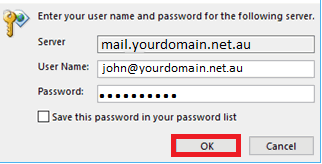
On older builds you will need to enter both the username (full email address) and password.
Step 7 - Test the email account by sending an email from / to your email address (e.g. from john@yourdomain.net.au to john@yourdomain.net.au). If this device can receive mail, the incoming server settings are correct. If the device can send mail, the outgoing server settings are correct as well. (Outlook will do this for you by default)

Outlook 2013 / 2010
Step 1 - Click on File.
Step 2 - Click on Add Account.
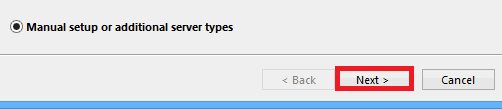
Step 3 - Select Manual setup and click Next.
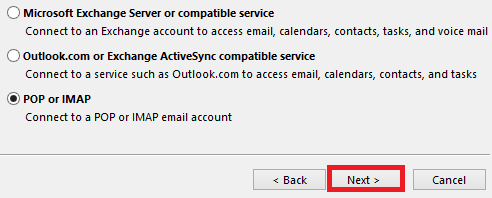
Step 4 - Select POP or IMAP and click Next.
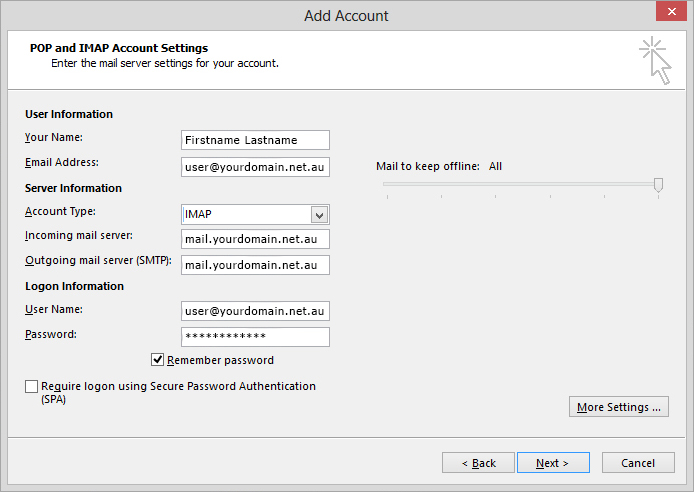
Step 5 - Add your details in and click More Settings.
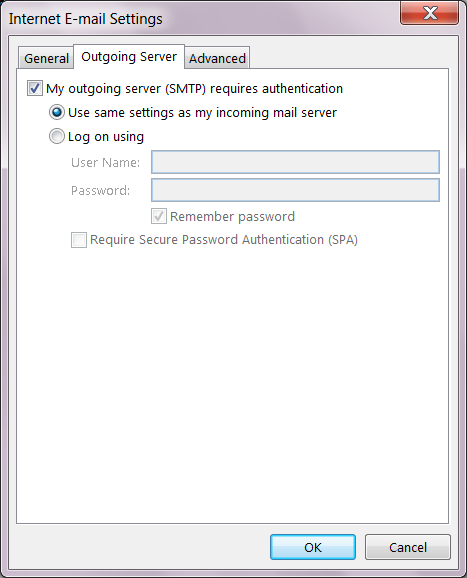
Step 6 - Select Outgoing Server and tick My outgoing server (SMTP) requires authentication then click on Advanced.
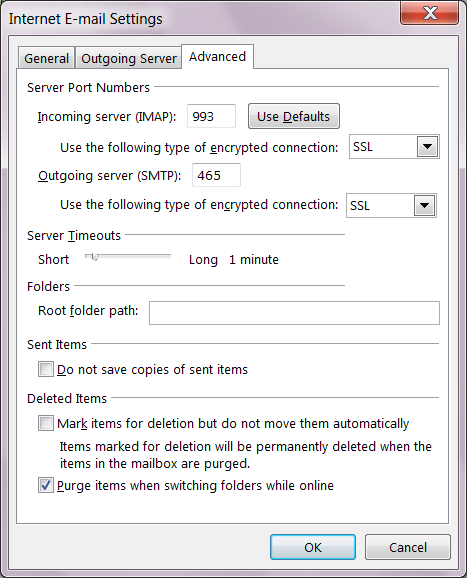
Step 7 - Set the Incoming server and Outgoing server settings to the same as in the picture below, then click OK.
Step 8 - Test the email account by sending an email from / to your email address (e.g. from john@yourdomain.net.au to john@yourdomain.net.au). If this device can receive mail, the incoming server settings are correct. If the device can send mail, the outgoing server settings are correct as well.
Outlook 2007
Step 1 - Click on Tools > Account Settings.

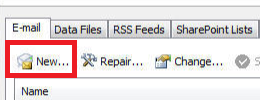
Step 2 - Click on New.
Step 3 - Click on Next.
Step 4 - Select Manually Configure and click Next.

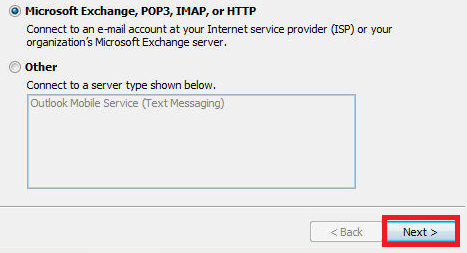
Step 5 - Select Internet E-mail and click Next.

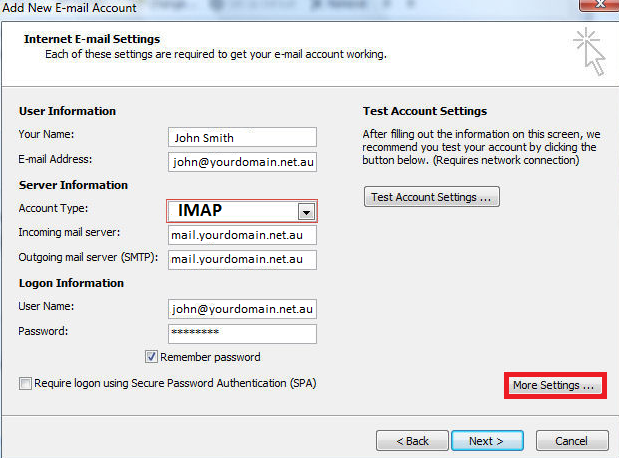
Step 6 - Add your email settings, make sure Account Type is IMAP and click More Settings.
Step 7 - Select Outgoing Server and tick My outgoing server (SMTP) requires authentication then click on Advanced.
Step 8 - Set the Incoming server and Outgoing server settings to the same as the picture below, then click OK.
Step 9 - Test the email account by sending an email from / to your email address (e.g. from john@yourdomain.net.au to john@yourdomain.net.au). If this device can receive mail, the incoming server settings are correct. If the device can send mail, the outgoing server settings are correct as well.


