WHM Firewall: Unblocking IPs, Whitelisting and Blacklisting IPs, Blocking Countries and Ports
Note: This tutorial is designed for VPS and Dedicated Servers. To maintain server security, clients using Personal, Business, Premium and Reseller plans do not have access to the CSF firewall.
Editing the firewall is an advanced function. This should be approached with care, as it is possible to block access to your server entirely. Unblocking IPs is generally fine to do, but for other functions, please feel free to
contact our support team if you are unsure.
How to access the WHM Firewall
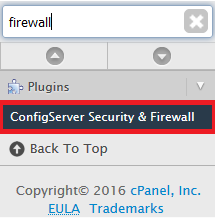
Log into WHM as root and navigate to ConfigServer Security & Firewall.
If you do not have your server's root logins, Managed VPS clients can find them by following this guide. Our support team can also reset and send these logins out if required.Unblock IP addresses
Step 1 - If your own IP is blocked, note down your IP (you can find it using ipchecker.com.au) then tether your phone's internet connection to your computer (your ISP or IT team
should be able to assist with doing this). You'll now be able to connect from another IP address that isn't blocked, and you will be able to unblock your main IP.
If another user is blocked, have them visit the website ipchecker.com.au from the device in question and note down their IP.
Step 2 - Access the WHM firewall as above.
Step 3 - Find the Search for IP section. Input the blocked IP address, then hit Enter or click on the Search for IP button.

Step 4 - If the IP is blocked you'll see this screen. Take note of the reason for the block. Click the green Unblock button to unblock the IP.

Step 5 - Once the IP is unblocked you will see this screen. Click Return.
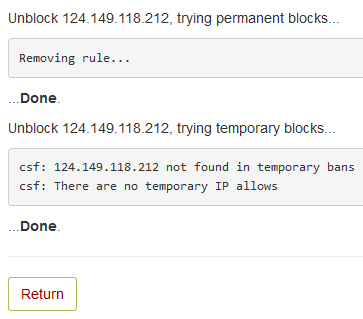
Note: This doesn't stop the IP from being blocked again. To find the exact reason for the block you will need to check error logs. The block message will give some guidance as to which error logs to check first.
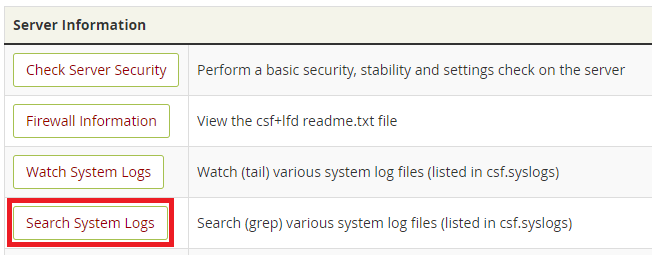
Step 6 - On the ConfigServer Security and Firewall main page, select Search System Logs.
Step 7 - Select the log to search in. A few common reasons for a firewall block and their associated logs are included below.
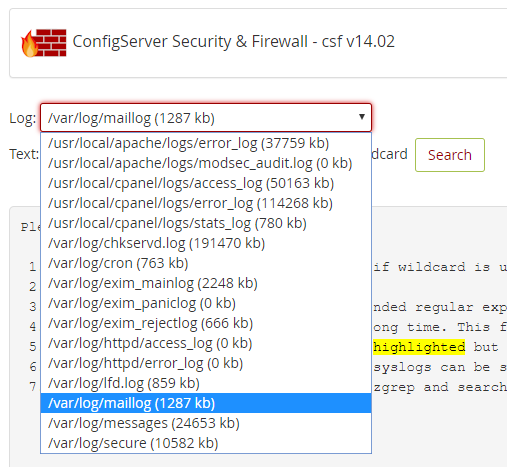
Failed IMAP/POP login: /var/log/maillog
Failed SMTP login: /var/log/exim_mainlog
Failed cPanel login: /usr/local/cpanel/logs/access_log
Failed FTP login: /var/log/messages
Failed SSH login: /var/log/messages or /var/log/secure
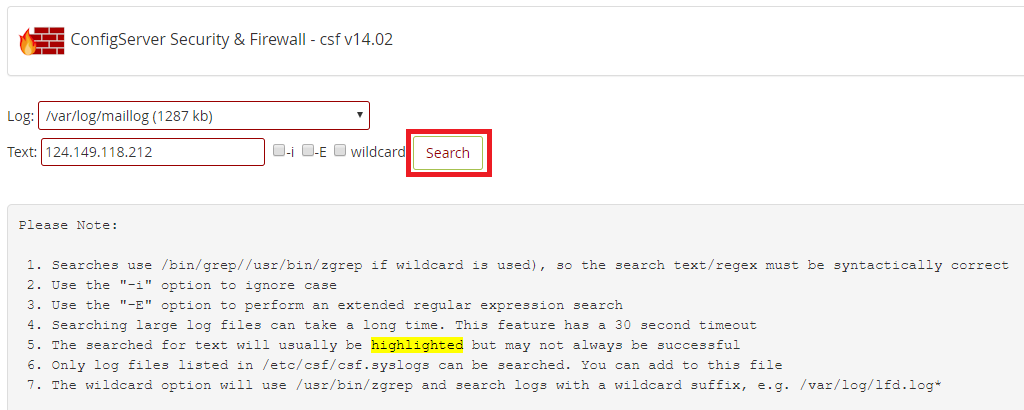
Step 8 - Enter your IP address, select the 'wildcard' box if the IP block did not happen today, and select Search.
Step 9 - Investigate the logs for clues as to what caused the block. In this example, we can see large amounts of failed email logins from someone with the username 'test@yourdomain.com'. We'd recommend contacting any person on this IP address who uses this email account, and confirming they have their emails set up correctly.

Alternatively, you could SSH into the server as root and run the corresponding commands, which would result in the same information being displayed. Replace '1.1.1.1' with the IP in question:
Failed IMAP/POP login: zgrep 1.1.1.1 /var/log/maillog* | grep fail
Failed SMTP login: zgrep 1.1.1.1 /var/log/exim_mainlog* | grep fail
Failed cPanel login: zgrep 1.1.1.1 /usr/local/cpanel/logs/access_log* | grep fail
Failed FTP login: zgrep 1.1.1.1 /var/log/messages* | grep fail
Failed SSH login: zgrep 1.1.1.1 /var/log/messages* | grep fail
If you're uncomfortable doing this, feel free to submit a support ticket, copy/paste the last line from Step 4 (starting with csf.deny) into the ticket, and we can help you find the cause of the block.
Whitelist or Blacklist IP addresses
WARNING: You should only ever whitelist an IP address if you have confirmed with your ISP that the IP is static and won't ever be given to any device other than your home/office router. Even then, a visitor/employee with access to your network or someone accessing your network without authorisation will have unrestricted access to hack your server while connected to the network. If you're experiencing constant IP blocks due to failed passwords, we recommend setting a temporary IP whitelist for a
few hours. Unless you have very specific technical requirements, there's never a good reason to permanently whitelist an IP.
To temporarily whitelist/blacklist an IP:
Step 1 - Access the WHM Firewall as above.
Step 2 - Look for the Temporary Allow/Deny option.
(1) Select either allow or deny.
(2) Input the IP address.
(3) Select the ports to whitelist/blacklist on. You can use * for all ports, or type one port or multiple separated by commas: e.g. '25,465,587'.
(4), (5) Select the amount of time you want the IP to remain in the list.
(6) Either press Enter or hit the Temporary Allow/Deny button.

To whitelist an IP address permanently:
Step 1 - Access the WHM Firewall as above.
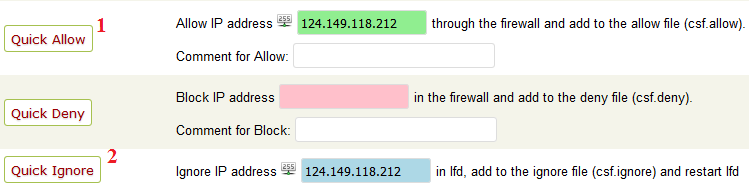
Step 2 - (1) Find the Quick Allow section, and add your IP address. We would recommend also leaving a comment (e.g. 'Office IP') so that you can tell why this IP was whitelisted later. Select Enter or the Quick Allow button.
Step 3 - (2) Find the Quick Ignore section, and add your IP address as well. Select Enter or the Quick Ignore button.
To blacklist an IP address permanently:
Step 1 - Access the WHM Firewall as above.
Step 2 - Find the Quick Deny section, and add your IP address. (1) We would recommend also leaving a comment (e.g. 'Manually blocked for wp-login abuse') so that you can tell why this IP was blacklisted later. (2) Select Enter or the Quick Deny button.

Remove a Whitelisted or Blacklisted IP
Step 1 - Access the WHM Firewall as above.
Step 2 - To remove a Whitelisted IP Click the Firewall Allow IPs button. To remove a Blacklisted IP click the Firewall Deny IPs button.

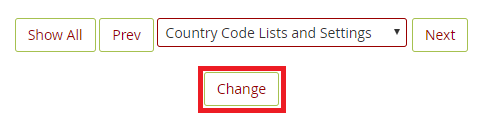
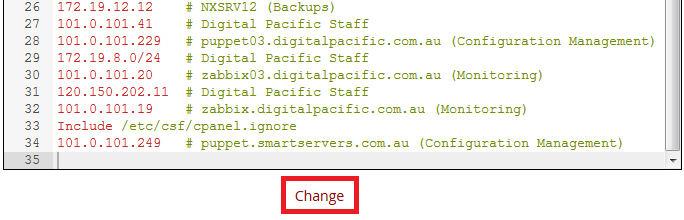
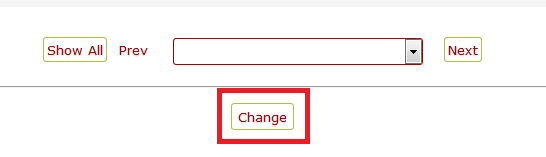
You will see a screen similar to the one bellow. Delete the whole line where the IP is listed and Change down the bottom.
Step 3 - Remove the IP in question from this list and click Change.

Step 4 - Click Edit next to the csf.ignore menu.

Step 5 - Remove the IP in question (if present) and click Change.
Block Ports
Blocking access through unused ports is helpful to reduce the avenues through which your server could be attacked. If your server is not used for email, if SSH access isn't used or if you only want secure SSL connections used for email, you can block the related ports on your server by removing them from the default allow list.
Wikipedia has a guide that lists ports and their standard uses: https://en.wikipedia.org/wiki/List_of_TCP_and_UDP_port_numbers
Step 1 - Access the WHM Firewall as above.
Step 2 - Click on the Firewall Configuration button.

Step 3 - Search for the TCP_IN and TCP_OUT functions. Remove the unused port numbers from these boxes.

Step 4 - Scroll down to the bottom of the page (it's long, so you may want to drag down from the sidebar) and hit Change.
Blacklist or Whitelist countries from accessing your server completely
Before you start, note that IP address lists are large enough that using this option can potentially cause your server speed to drop. We would recommend monitoring your server load and site load speeds for a week or two after making the change.
This will also prevent any email or web traffic from countries not whitelisted. The upside is that this has a significant positive effect on your server security. Finally, the country IP lists are about 99% correct. If a client can't access your server, it's worth performing a lookup on their IP to see if it is classified as the wrong country.
You can also apply blocks on a per-cPanel account basis. Click here for a tutorial. The tutorial assumes your server has Geo_IP installed, and only blocks ports 80 and 443.
Step 1 - Access the WHM Firewall as above.
Step 2 - Click on the Firewall Configuration button.

Step 3 - Find the CC_DENY option. This can be used to prevent access from specific countries. Alternatively, below this is the CC_ALLOW_FILTER option. This creates a list of countries which can access your server normally, while IPs from countries not on this list will be refused access. Note that the 'CC_ALLOW' option should not be used.
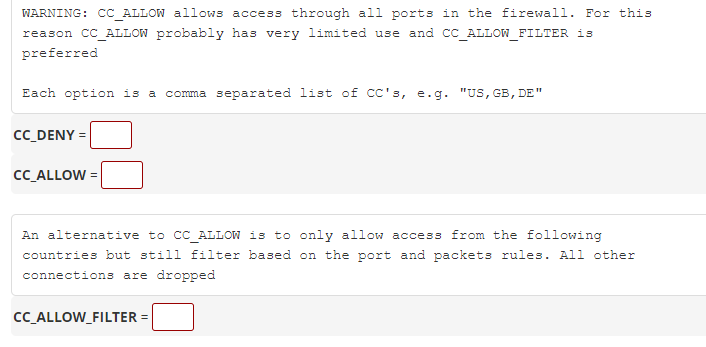
Step 4 - Add the required country codes into the Deny or Allow list. A list of country codes can be found at this link.
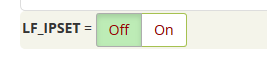
Step 5 - Scroll down and enable LF_IPSET (this helps mitigate the increased load on your server from these rules).
Step 6 - Scroll down to the bottom of the page (it's long, so you may want to drag down from the sidebar) and hit Change.