Dedicated Server and VPS - RapidRestore Backup Restore Guide
This guide is designed for Dedicated Server and VPS hosting. For Shared and Reseller hosting, a restore guide can be found
here.
Note that depending on the service, the RapidRestore panel will look different. The same options are still present.
How to Access your RapidRestore Backups (New Panel)
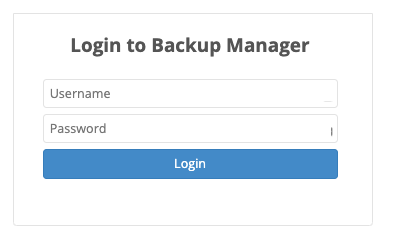
Step 1 - Log into your RapidRestore server.
When the service was provisioned, you would have been sent an email with your R1soft Login details. If you don't have these logins, you can request them by submitting a support ticket.
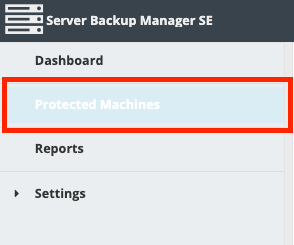
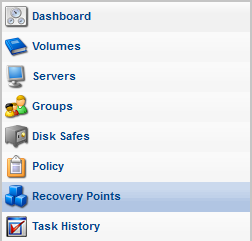
Step 2 - On the left hand side, click on Protected Machines.
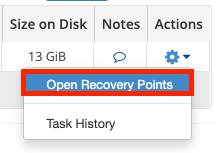
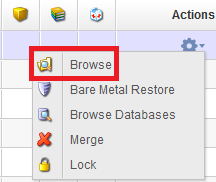
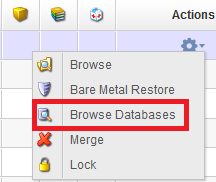
Step 3 - On the right hand side, select the Actions icon, and then click on Open Recovery Points.
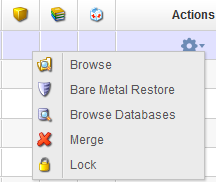
Step 4 - Find the date and time that you wish to restore from, and then click on the Actions icon to either:
Browse - Browse backup files and restore them.
Bare Metal Restore - This is a full restore of the server from the drive level. We do not recommend you select this unless it is absolutely necessary (it may also take an extended amount of time to restore depending on your drive size).
Browse Databases - Browse backed up databases and restore them.

How to Access your RapidRestore Backups (Old Panel)
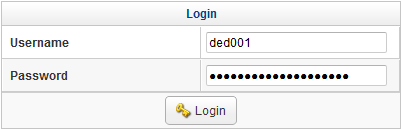
Step 1 - Log into your RapidRestore server.
When the service was provisioned, you would have been sent an email with your R1soft Login details. If you don't have these logins, you can request them by submitting a support ticket.
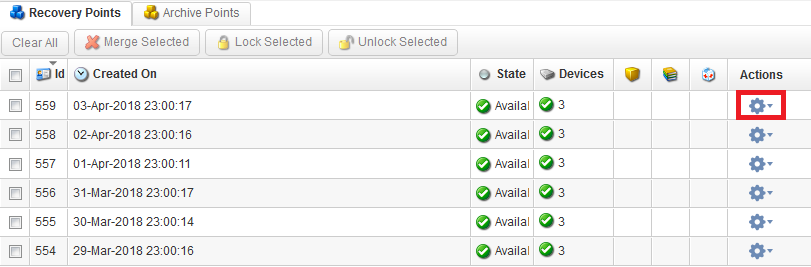
Step 2 - Click on Recovery Points.
Step 3 - Click on the gear icon for the recovery point you want to restore from.
Step 4 - Click on the option to perform the associated action:
Browse - Browse backup files and restore them.
Bare Metal Restore - This is a full restore of the server from the drive level. We do not recommend you select this unless it is absolutely necessary (it may also take an extended amount of time to restore depending on your drive size).
Browse Databases - Browse backed up databases and restore them.
How to Restore Files
This guide assumes you're restoring the public_html folder (website) of one of your cPanel accounts. If you are restoring another folder, perform the same steps for that folder instead.
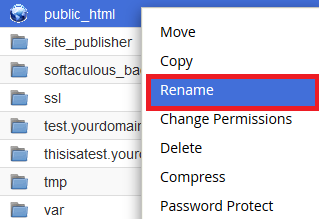
Step 1 - Use the cPanel File Manager tool to rename the current public_html folder.
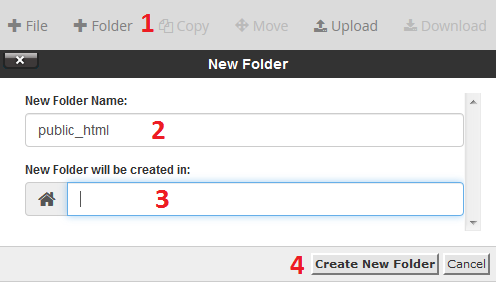
Step 2 - Create a new, empty public_html. This will ensure that the backup is restored cleanly.
(1) Click on +Folder.
(2) Type public_html.
(3) Leave the second field blank.
(4) Click Create New Folder.
Step 3 - Follow the 'How to Access your RapidRestore Backups' section above. Ensure you selected the correct restore date.
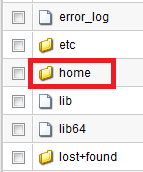
Step 4 - Double click on the Home folder.
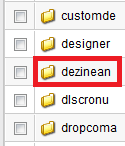
Step 5 - Double click on the folder of the cPanel account you want to restore. If you have a lot of cPanel accounts, you might need to use the arrows down the bottom of the page to see the full list of accounts.
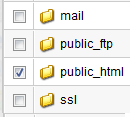
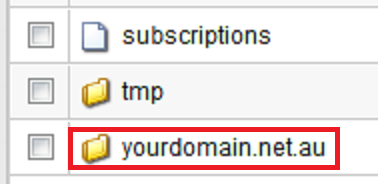
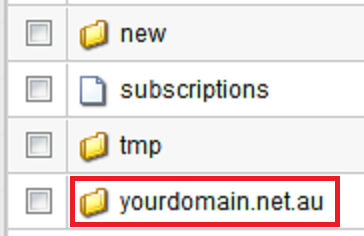
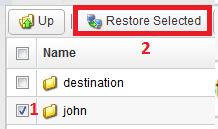
Step 6 - Check the box next to the folder you wish to restore. Normally this will be the public_html folder, however addon domains and sub domains will have their own document root. Check with your web developer if unsure.
Step 7 - Click Restore Selected.

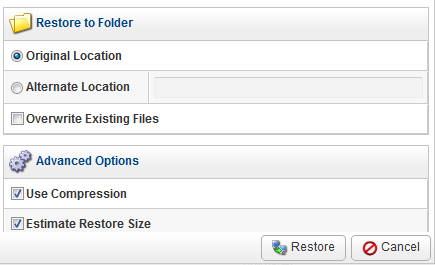
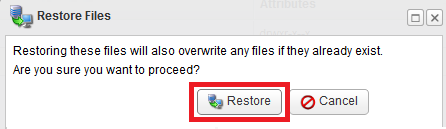
Step 8 - Leave all options as their default values and click Restore.
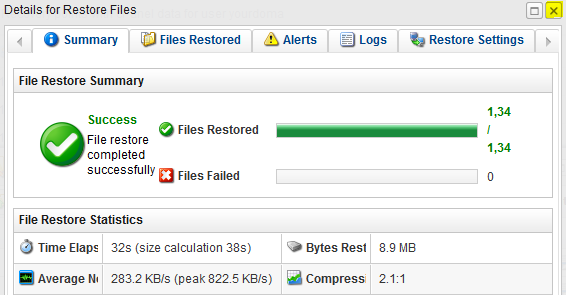
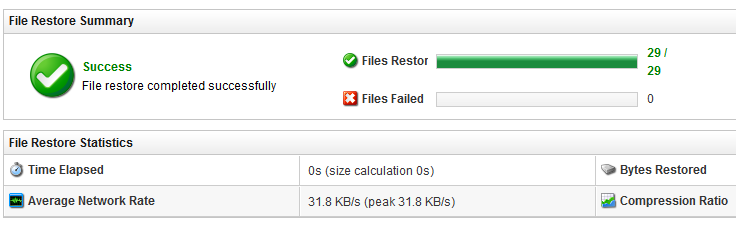
Step 9 - Once the restore is finished you can close the window.
You may get some errors under Files Failed. It's expected to get a few of these from cache files which aren't needed when restoring website data.
How to Restore Database Data
Note that restoring a database from these backups will overwrite the current database. If you need any information from the current database, we recommend following this guide to download a copy beforehand.
Step 1 - Follow the 'How to Access your RapidRestore Backups' section above and access the Browse Databases section. Ensure you selected the correct restore date.
Step 2 - (1) Select the database you want to restore, then (2) click Restore Selected.
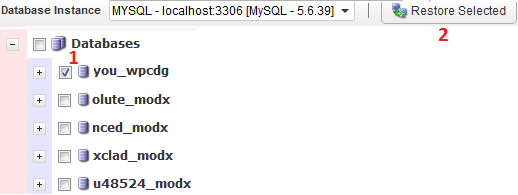
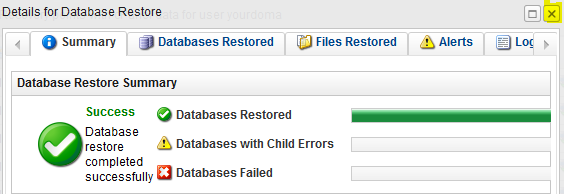
Step 3 - Click Restore to begin.

Step 4 -
The database will now begin restoring. Close the window once restore is complete.
How to Restore Emails
This procedure restores all emails that were on the server
for that email account at the specific time of the backup point's date.
This won't affect or delete any other emails currently on the account.
If you had set up your email account on a device using POP, the emails
may have been downloaded onto your device and deleted from the server in the time between 2 download
points, meaning the emails may not have been backed up.
If the email account was deleted from cPanel, you'll first have to create it again from the Email Accounts tool in cPanel.
Step 1 - Follow the 'How to Access your RapidRestore Backups' section above. Ensure you selected the correct restore date.
Step 2 - Double click on the Home folder.
Step 3 - Select the folder of the cPanel account you want to restore from.
Step 4 - Select the Mail folder.

Step 5 - Double click on the domain name of the primary email address.
Step 6 - Double click on the domain name for the email account in question.
Step 7 - Tick the box for the user/email account you want to be restored and hit Restore Selected.
Step 8 - Click Restore.
Step 9 - Once the restore is complete, you can exit the window.
If
your email account is set up on an email program like your phone or
Outlook, either hit the Send/Receive all emails menu (most email clients
should have a similar option) or wait a few minutes as some email
clients are on a 15min timer where they check for new emails
automatically.


