How to create a Subdomain in Plesk
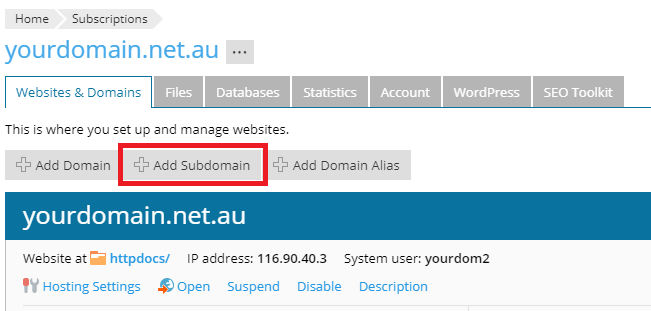
Step 1 - Log into Plesk and navigate to the
Websites and Domains page.
Step 2 - Click on
Add Subdomain.
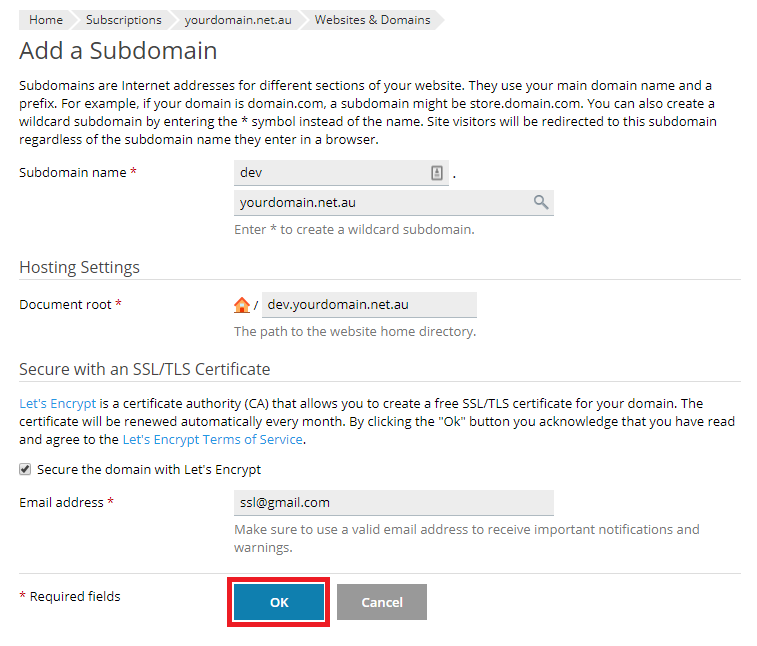
 Step 3 -
 Enter the subdomain name (e.g.
dev for dev.yourdomain.net.au), enter a valid email address if you want free SSL Certificates for this subdomain, then select
OK.
 Step 4 -
 You will now need to set up a DNS record to point this subdomain to this server.
If you are using our free DNS manager, use
this guide to access your DNS Manager in your client area. If you're using cPanel for DNS management, follow
this guide. Otherwise, reach out to your DNS provider to add an A record as follows:
Name: dev.yourdomain.net.au (or the name of your subdomain)
Type: A
TTL: 3600
Record: The IP address of your Plesk Server.
You would have been sent your IP in an email when you signed up for the product, but it can also be found by doing a
A Record lookup on your server name (e.g. vmpl01.ha-node.net)
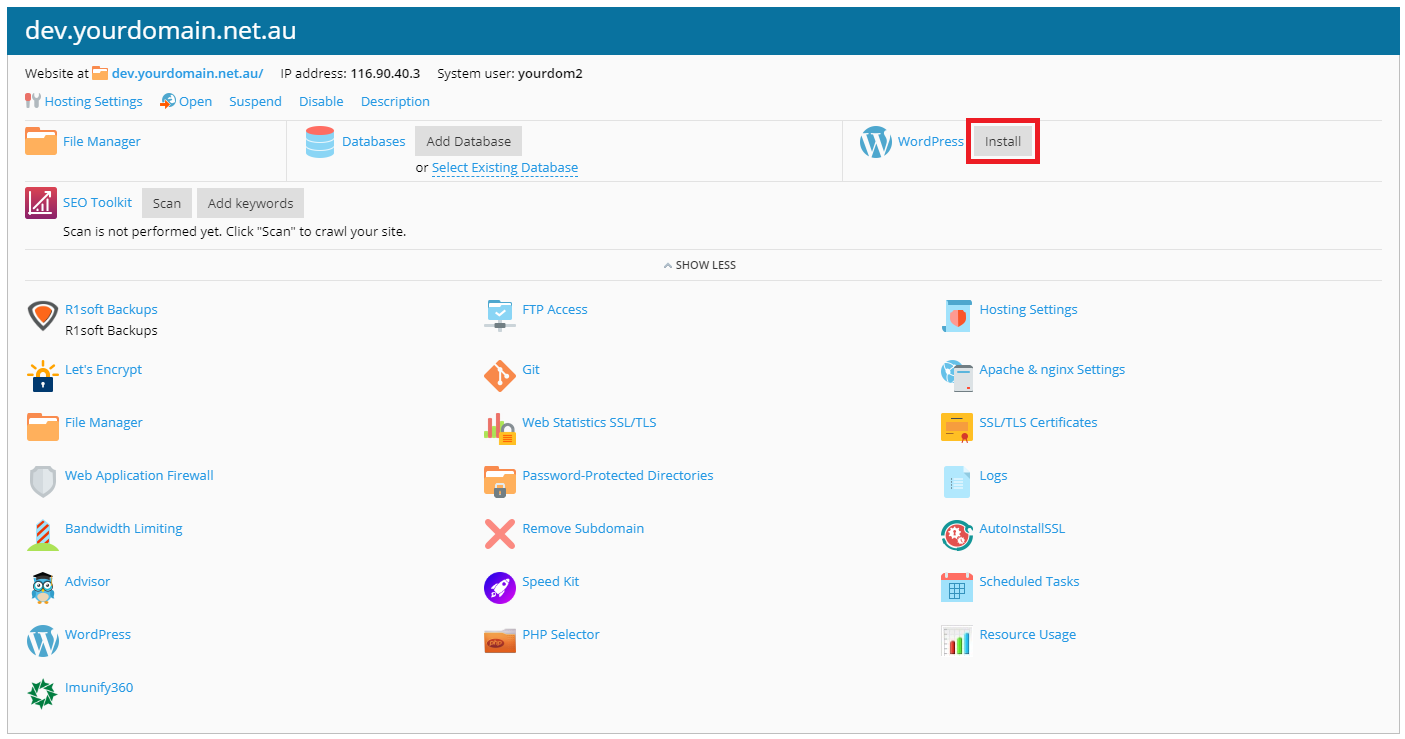
Step 5 - After DNS propagation has completed, your subdomain will be loading live from your Plesk server. You can click
Install Wordpress to start a new site, or manually upload files to the Document Root instead.