How to create a Wordpress staging sub-domain on Plesk
Note: This is an advanced guide and may take 1hr+ to complete. Please note that if the steps are followed incorrectly and the site fails to load, our support team will not be able to investigate or fix any development problems. If required, we could perform a manual migration to carry out these steps on your behalf. You can find more information
in this guide.
The information in this guide is provided as a suggestion, and we can't provide detailed support for modifications to a Content Management System. If you require assistance with this, we'd recommend speaking to your website developer to ensure relevance and compatibility with your site.
Step 1 - Decide what domain you'd like to use for your staging site. We'd recommend creating a subdomain like '
dev.yourdomain.net.au'. If you'd like to use something else, you can modify the provided steps as needed.
Step 2 - Log into Plesk and create a subdomain for 'dev.yourdomain.net.au'. We have a guide on this process
here.
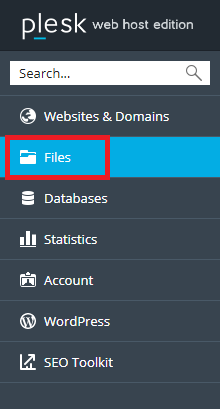
Step 3 - Open the
File Manager.
 Step 4 -
(1)
Step 4 -
(1) Navigate to the httpdocs directory (or the folder that is currently hosting the live website).
(2) Click on the
Select All button.
(3) Click
Copy.
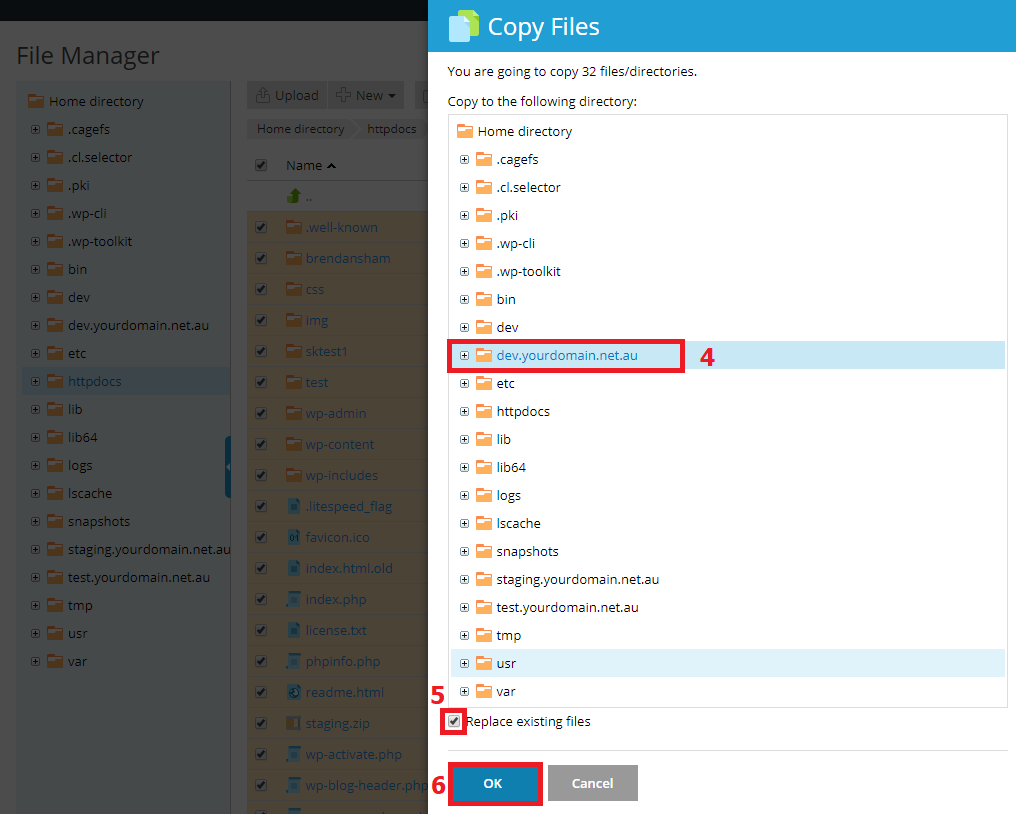
 Step 5 -
(4)
Step 5 -
(4) Click on
dev.yourdomain.net.au (Or the place where your staging site files are going to be stored).
(5) Select
Replace Existing Files.
(6) Click
OK.
 Step 6 -
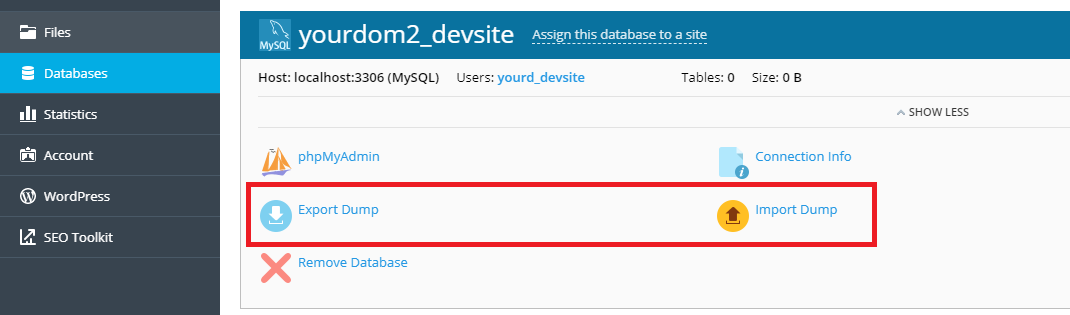
 Navigate to the
Databases section and create a new, blank database and user.
Click here for a guide on how to do this. Make a note of the newly created
database name,
username and
password somewhere on your computer.
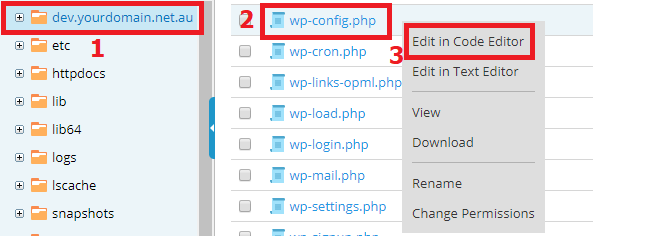
Step 7 - Navigate back to the
Files section of Plesk.
(1) Enter the
sub-domain folder (dev.yourdomain.net.au in this case).
(2) Click on the
wp-config.php file.
(3) Click on
Edit in Code Editor.
 Step 8 -
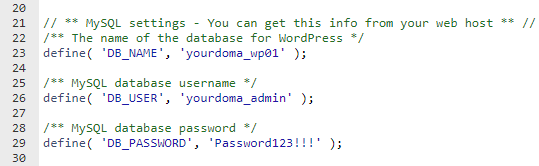
 Find the lines relating to the MySQL database username and password.
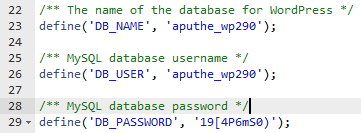 Step 9 -
 Replace the existing database details with those of the database and user you just created.
If, for example, you set up a database with the following details:
Database Name: yourdoma_wp01
User: yourdoma_admin
Password: Password123!!!
Then your
wp-config.php file will look like this:
Make sure to hit
Save Changes to update the new database details.
 Step 10 - Export
 the live site's database into an .sql file, then
Import it into the new, blank database you created. You can use
this guide to export and import databases.
If you don't know which database belongs to the live site, you can navigate to the Document Root you copied the files from (
Step 4), then open the wp-config.php file (
Step 7) to check the DB_NAME.
 Step 11 -
 Finally, you will need to update the primary URL associated with the Wordpress installation (from, for example, yourdomain.net.au to dev.yourdomain.net.au).
Click here for a guide on doing that.
Note: The login to the admin section for the live site will be the same, but there will be a different login link available as well. If you previously accessed the admin panel using, for example, yourdomain.net.au/wp-admin, the new link for the dev site will be dev.yourdomain.net.au/wp-admin. Try /wp-login.php if you get an error when going to /wp-admin.
You can now start work on your development site. Once you are ready to bring this site live, you can use
this guide to do so.
For more tutorials on website development and Wordpress troubleshooting, view our List of Wordpress Guides.


