How to Migrate / Transfer Your Website or Email from Your Old Host
To transfer over to our hosting, you will need to first purchase hosting with us. Information about our hosting packages are available on our website
here. Alternatively, contact our Sales team on 1300 694 678 or submit a Sales enquiry
here.
Our migrations team operates between the hours of 8pm and 5am. For email migrations, we will update DNS if possible and run the process again 3 times throughout the night to ensure that no emails are missed.
- Full cPanel to cPanel migrations are charged at $99 per cPanel account. This includes website and emails.
- Non-full cPanel migrations (e.g. addon domain to primary domain) and Manual migrations are charged at $149 per website.
- Email migrations to cPanel are charged at $149 for the first 2 email accounts and $10 each for any additional email accounts.
- Email migrations to GSuite hosting are charged at $49 per mailbox.
Have Us Migrate / Transfer Your Website
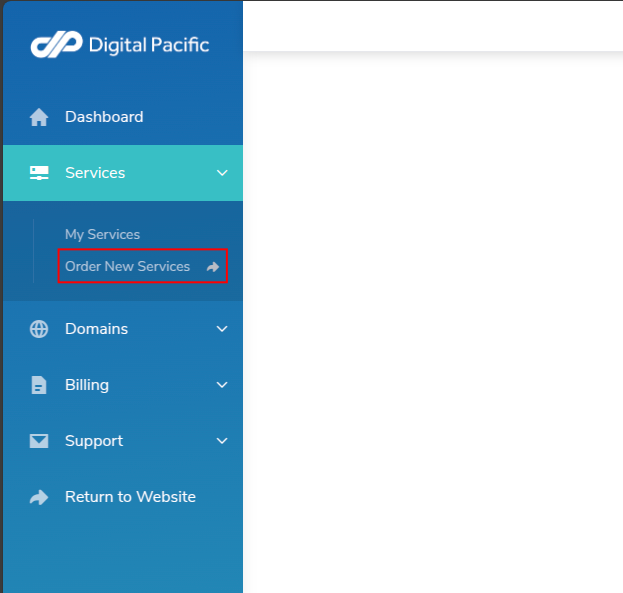
Step 1 - Log into your Client Area.
Step 2 - Click on Order New Services.

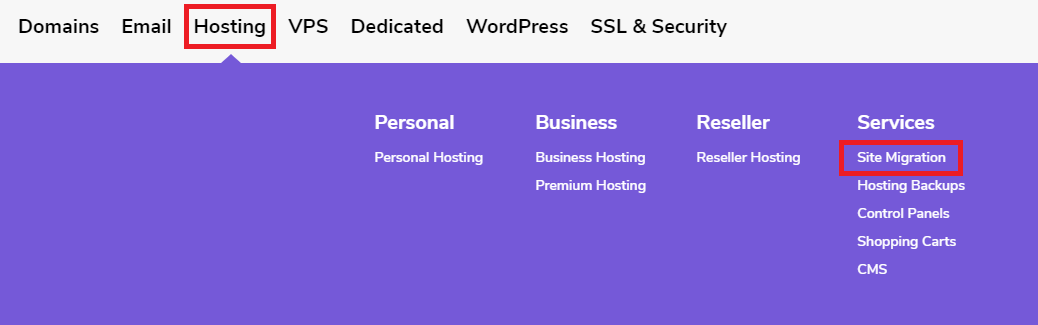
Step 3 - Select Hosting then Site Migration.
Step 4 - Choose either a cPanel to cPanel or Non-cPanel Account Migration.
Note: If you're unsure whether your old host used cPanel or another service, submit a support request from your Client Area with the details you have and we'll process it manually for you.

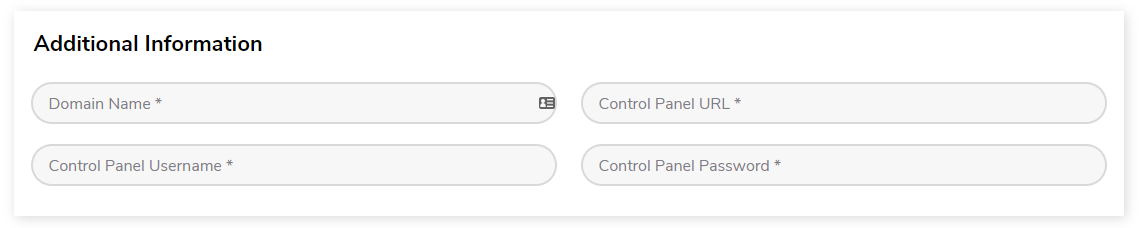
Step 5 - Add your details and complete the checkout. A support ticket will automatically be created so our support staff can check the details to make sure they work, and then they'll book the migration and send you an email with the details.
Have Us Migrate / Transfer Your Email
Note: If you're transferring all the emails from one cPanel account into another, follow the "Have Us Migrate / Transfer Your Website" guide instead, as we can just migrate the whole cPanel account as one item which is an easier and less expensive than migrating emails manually.
Step 1 - Log into your Client Area.
Step 2 - Click on Order New Services.
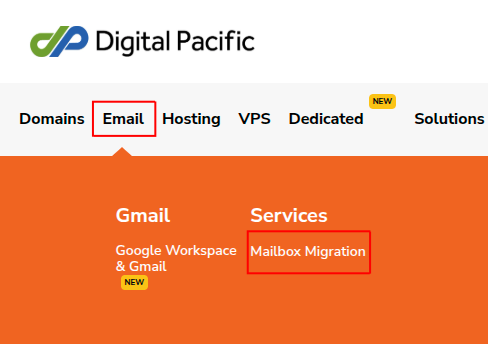
Step 3 - Select Email then Mailbox Migration.
Step 4 - Choose either a GSuite or cPanel Email Account Migration.
Note: If you're unsure which service you'd prefer to move to, submit a support request from your Client Area with the details you have and we'll answer any questions you may have about the separate services.

Step 5 - Add your details and complete the checkout. A support ticket will automatically be created so our support staff can perform a migration investigation, and then they'll book the migration and send you an email with the details.
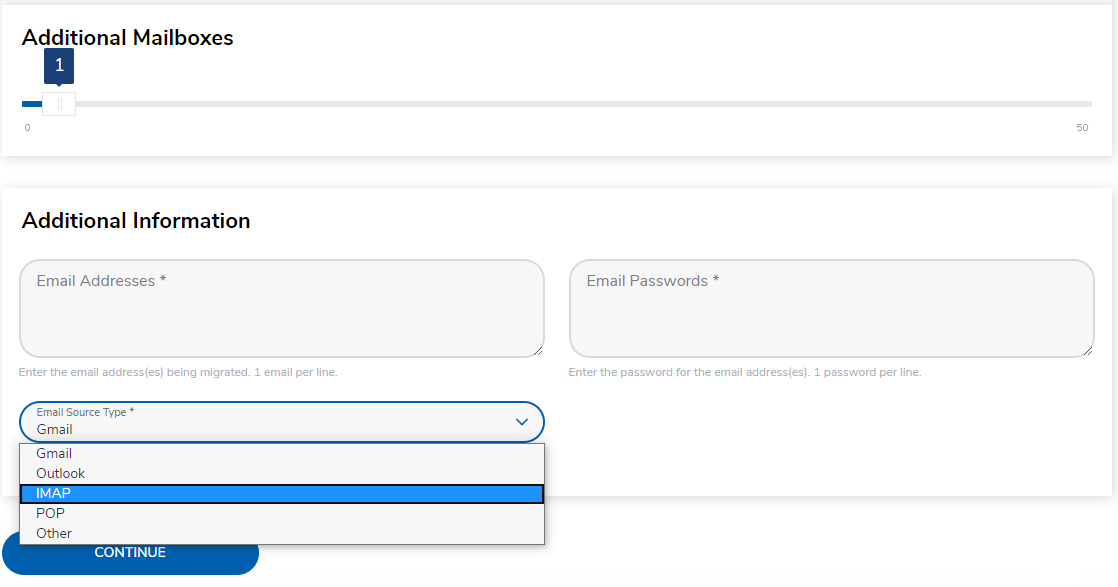
Manual steps: Log into your Client Area and submit a support ticket. In the ticket we need the following information for each email address you want migrated.
Email Account:
Server Host name:
Email Username:
Email Password:
e.g.
Email Account: john@yourdomain.net.au
Server host name: mail.yourdomain.net.au
Email Username: john@yourdomain.net.au
Email Password: KonoD10D4
Once we receive the ticket, we'll perform a migration investigation to confirm the details work, as well as check any other necessary details. We'll then work with you to get the emails migrated over.
How to manually migrate a website to our hosting
Note: This is an advanced guide and may take 1hr+ to complete. Please note that if the steps are followed incorrectly and the site fails to load, our support team will not be able to investigate or fix any development problems. If required, we could perform a manual migration to carry out these steps on your behalf as above.
The information in this guide is provided as a suggestion, and we can't provide detailed support for modifications to a Content Management System. If you require assistance with this, we'd recommend speaking to your website developer to ensure relevance and compatibility with your site.
Dedicated guides:
If you have a VPS or Dedicated Server, click here to follow our guide on using the WHM Migration Tools.
To move a WordPress site from a staging domain to a live one in cPanel, follow this guide for more information.
To manually migrate a Wordpress website to cPanel, follow this guide for more information.
To manually migrate a Wordpress website to Plesk / Wordpress hosting, follow this guide for more information.
Step 1 - Obtain a backup of the site files and the database of your website. Generally your old host will be able to provide this for you on request. If you are provided a cPanel backup, you will need to extract files with a free program like 7zip or WinRar.
Step 2 - (Optional) If your cPanel backup includes Addon domains or Subdomains, log into cPanel and add them (click here for a guide).
Step 3 - Use the cPanel File Manager (click here for a guide) to upload the contents of the public_html folder from your computer to the public_html folder onto your new hosting service. Note that you may have Subdomains or Addon domains with folders inside the public_html folder. In this case, add them to the appropriate folder (as cPanel now sets the root folder for these domains to be outside the public_html folder).
If your website just uses HTML (Dreamweaver and WYSIWYG web builders) the migration is complete. If your site uses a database (WordPress, Joomla, Magento, etc) follow the rest of this guide.
Step 4 - Use the MySQL Database Wizard to create a new database (click here for a guide). Make sure to copy the full MySQL database name, username and password (including the 'cpanelusername_' portion) into notepad or another text editor, as they'll be needed in the next step.
Step 5 - Find the website configuration file (click here for a guide). Replace the database name, username and password with the details created in Step 4.
Step 6 - Import the .sql file from your backup into your new database (click here for a guide). If this is a cPanel backup, you'll find a file called 'database_name.sql' which you can use to restore.
Once that's done, the migration should be complete. Before updating the DNS, you can preview the website using a Hosts file edit to ensure the migration worked (click here for a guide).
Note About Email Accounts: If you have active emails with us, you will need to submit a support ticket through your Client Area to advise us that you've done a manual cPanel migration and request we run the mailperms script. After that you need to go into the Webmail for an account (from cPanel > Email Accounts > More) and send an email to another account to "kick things off" and have the old emails appear.
How to manually migrate emails to our hosting
To migrate emails from other email clients into Webmail, the easiest way is to export your original mailbox to a backup file and then import it into your email client. If your email client is set up as IMAP, this will also sync the emails onto the server. We have a guide on email backups and archives for different mail clients, but since the use of email clients is outside of our support scope we're unable to provide detailed instructions on this subject.
To migrate emails to GSuite, follow Google's guide on the subject.
To migrate emails to Office 365, follow our guide to migrate emails to an Office 365 account using IMAP. Alternatively you can check Microsoft's documentation.


